When a dental scan file arrives at our studio, the first 60 seconds are critical. Before a single design tool is touched, our designers assess the scan for completeness, articulation quality, and margin visibility. A poor scan doesn't just slow us down — it leads to restorations that don't fit, require remakes, and ultimately cost your practice time and money.
This guide explains exactly what we look for in an intraoral scan, written for dentists and technicians who want to understand the relationship between scan quality and CAD design outcomes.
Why Scan Quality Matters in CAD Design
Dental CAD design begins where your scanner ends. Every measurement, every contact point, every margin line drawn in Exocad or 3Shape is derived directly from the STL geometry you provide. If that geometry is ambiguous, distorted, or missing key areas, the designer must either guess or request a rescan — both outcomes you want to avoid.
The three most common sources of case delays we receive are:
- Missing opposing arch data — impossible to set occlusal contacts correctly
- Poor prep margin visibility — forces approximate margin placement
- Incomplete scan body capture — prevents accurate implant position reconstruction
Key insight: In our studio, approximately 22% of incoming cases require rescan or clarification requests before design can begin. The leading cause is prep margin ambiguity — directly addressable at the chairside.
The Three-Arch Rule
Every case we receive should include three arch captures as a minimum:
- Prep arch — the jaw containing prepared teeth, with maximum soft-tissue retraction at the prep site
- Opposing arch — the antagonist dentition, fully captured to the distal molars
- Buccal bite registration — at least one buccal scan in maximum intercuspation so the designer can align upper and lower arches correctly
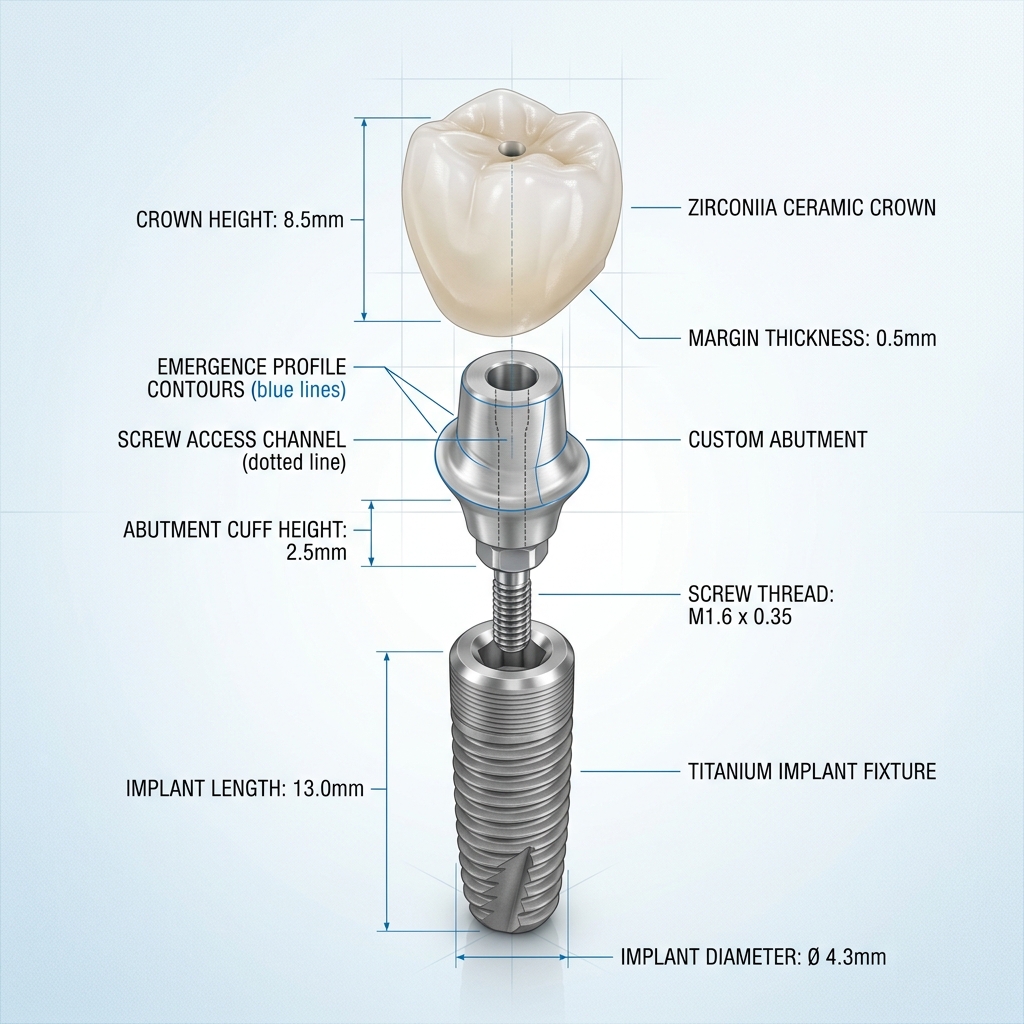
For implant cases, add a fourth scan with the scan body in situ. This allows reconstruction of the implant axis in 3D space — essential for abutment angulation and screw channel direction.
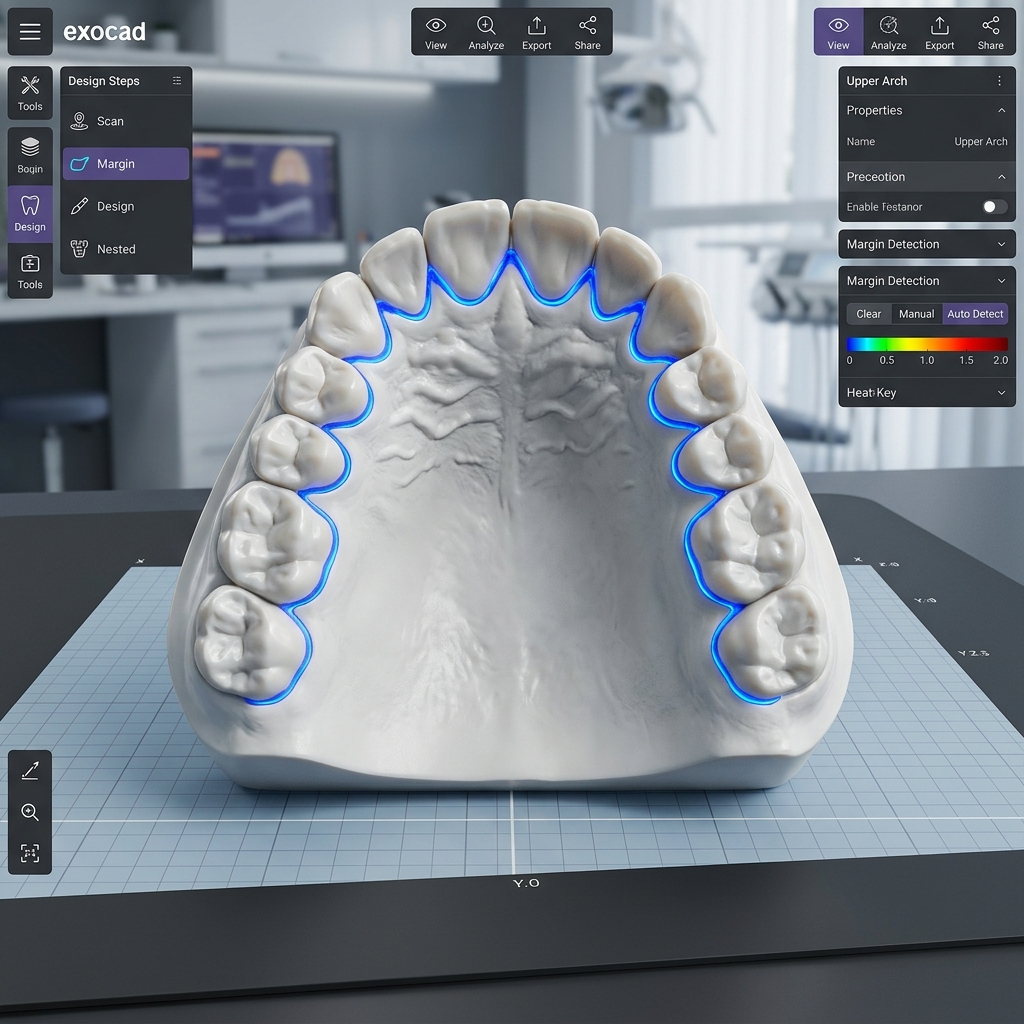
Upper and lower arch STL models aligned in Exocad via buccal bite registration
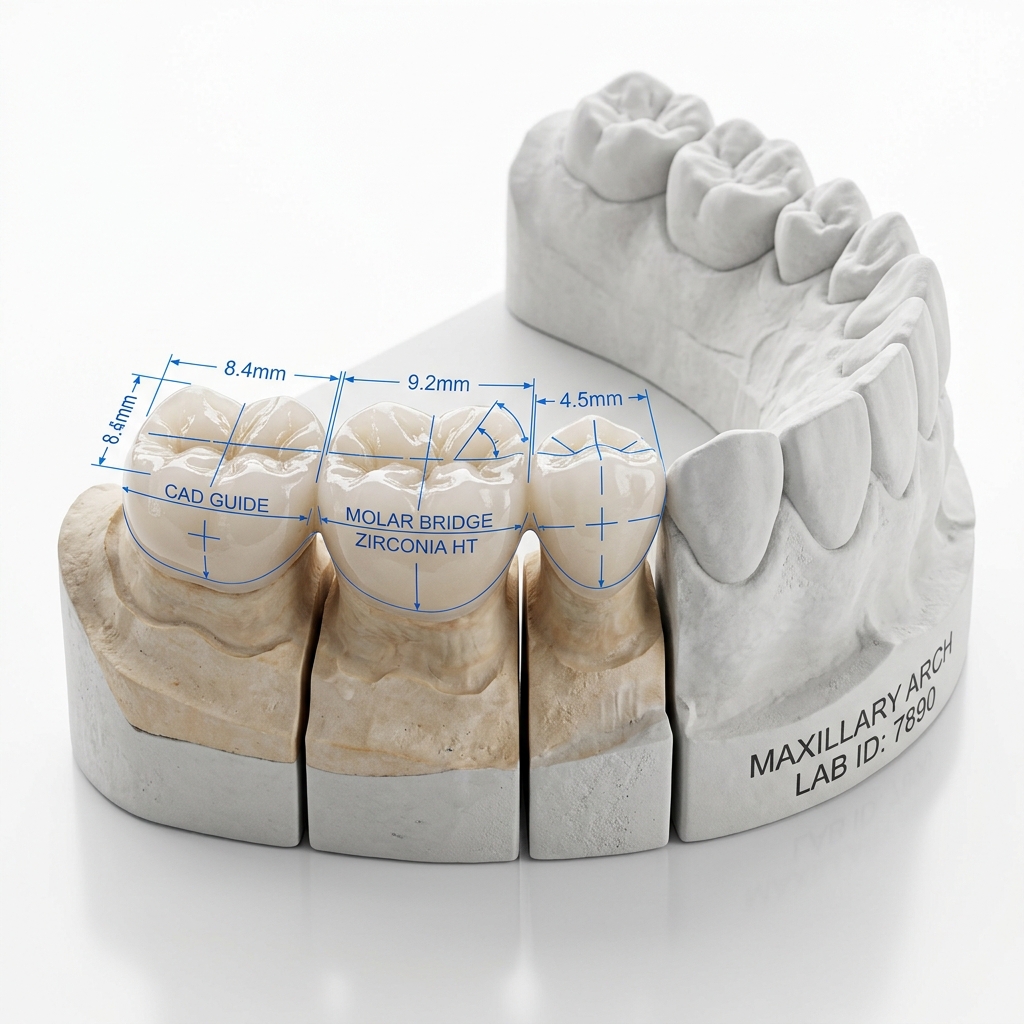
Reading Margin Lines: What We Can and Cannot See
The prepared margin is the single most critical area of any restorative scan. Our designers can typically work with margins that are:
- Fully visible without undercut artifacts
- Clearly differentiated from adjacent unprepared enamel
- Captured at the gingival level, not obscured by tissue
Shoulder and chamfer preparations are the easiest to read in a scan. Deep subgingival knife-edge margins are the most challenging — retraction cord use before scanning is strongly recommended for these cases.
Clinical tip: Double-retraction cord technique (thin cord left in; thicker cord removed before scan) consistently produces the cleanest subgingival margin visibility in our experience.
Scan Body Positioning for Implant Cases
For implant-supported restorations, the scan body is your designer's reference point for everything. A scan body that is:
- Loose or tilted → incorrect implant axis reconstruction
- Partially obscured by soft tissue → reduced accuracy in library matching
- Not identified (no scan body noted in case form) → delays while we request specs
Always include the implant system name, implant diameter, platform connection type, and scan body reference number in your case notes. Our team maintains an extensive library of compatible scan bodies, but matching is only possible when the specification is provided.
Ready to send your first case?
Upload your STL files and case notes directly. Our team reviews every submission within 2 hours.
The 10 Most Common Scan Errors We See
| Error | Impact on Design | Fix |
|---|---|---|
| Missing distal molar on opposing arch | No posterior stop — contact design unreliable | Extend scan to last molar |
| Tissue covering margin | Approximate margin only | Retraction cord before scan |
| Star/void artifacts at prep site | Must manually extrapolate margin | Re-scan prep area slowly |
| Scan body not fully captured | Library match impossible | Full 360° capture of body |
| No buccal bite registration | Cannot confirm occlusal plane | Capture buccal bite at MIP |
| PLY file with missing color data | Can work, but shade guidance lost | Export both STL + PLY |
| Opposing arch missing teeth | Cannot set contact heights correctly | Full arch scan even for single units |
| Cropped file (incomplete arch) | Missing posterior reference | Save full unbounded scan |
| Wrong file sent | Design delays waiting for correct file | Label files: upper.stl, lower.stl, bite.stl |
| DICOM not aligned to scan | Implant planning requires manual alignment | Include scan reference in CBCT comments |
Pre-Submit STL Quality Checklist
- Prep arch fully captured — no voids at prep site
- Opposing arch extends to distal molars bilaterally
- At least one buccal bite registration at MIP
- Retraction cord used for subgingival margins
- Scan body fully visible (360°) for implant cases
- Implant system, diameter, and platform specified in notes
- Files labeled: prep.stl, opposing.stl, bite.stl
- No duplicate files or outdated scans included
Following this checklist before every submission will significantly reduce your case turnaround time and all but eliminate revision requests related to scan quality. Our best partner labs submit accurate, labeled files every time — and their cases are consistently delivered first.