Two of the most common case types we handle are fundamentally different in scope, complexity, and design philosophy — yet they're often requested using the same vague brief: "Please design a restoration for my patient." Crown and bridge cases and full-arch implant-supported cases require distinct workflows, different information from you, and different timelines from us.
Understanding when to choose which path will help you submit better case notes, set accurate patient expectations, and receive designs that need fewer revisions.
Defining the Two Workflows
At their core, the difference is this:
- Crown & Bridge — tooth-supported or tooth-implant restorations involving 1–4 units, using classical restorative parameters (contacts, occlusion, emergence) as design drivers
- Full-Arch — implant-supported restorations spanning a complete arch (typically 4–6 implants using All-on-X protocols), where prosthetic design, screw access, and biomechanical load distribution govern every design decision
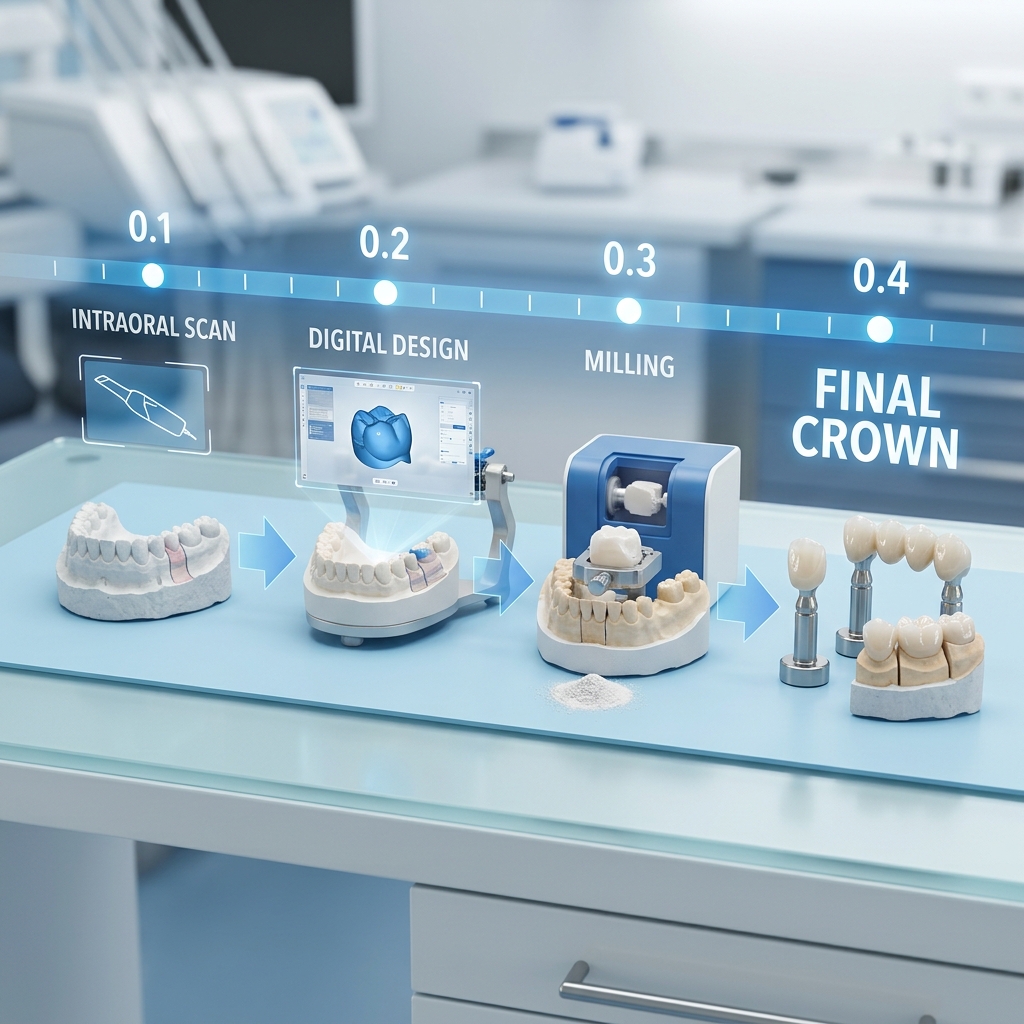
The workflow divergence begins at the scan stage and continues through design, material selection, output format, and delivery protocol.
Crown & Bridge: What the Workflow Covers
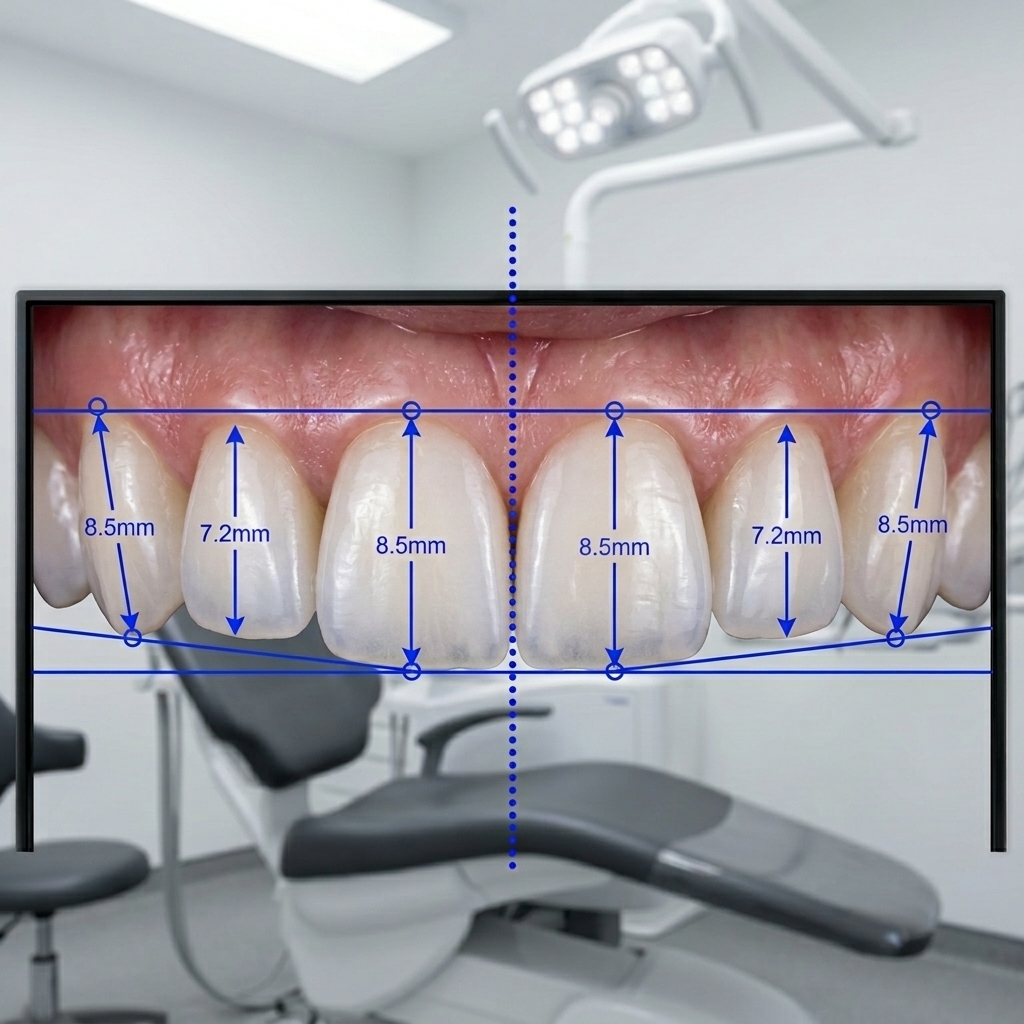
For standard restorative cases, the design brief focuses on:
- Occlusal relationship to the opposing dentition (contacts, fossa position)
- Proximal contacts with adjacent teeth
- Emergence profile relative to the natural gingival architecture
- Pontic design for bridge cases (convex, ovate, sanitary)
- Material thickness and minimum connector dimensions for bridgework
Designer's note: For a 3-unit bridge, connector cross-section is the single most important factor we assess. Zirconia connectors must meet minimum 9 mm² for posterior bridges to avoid fracture. Always specify your mill material upfront.
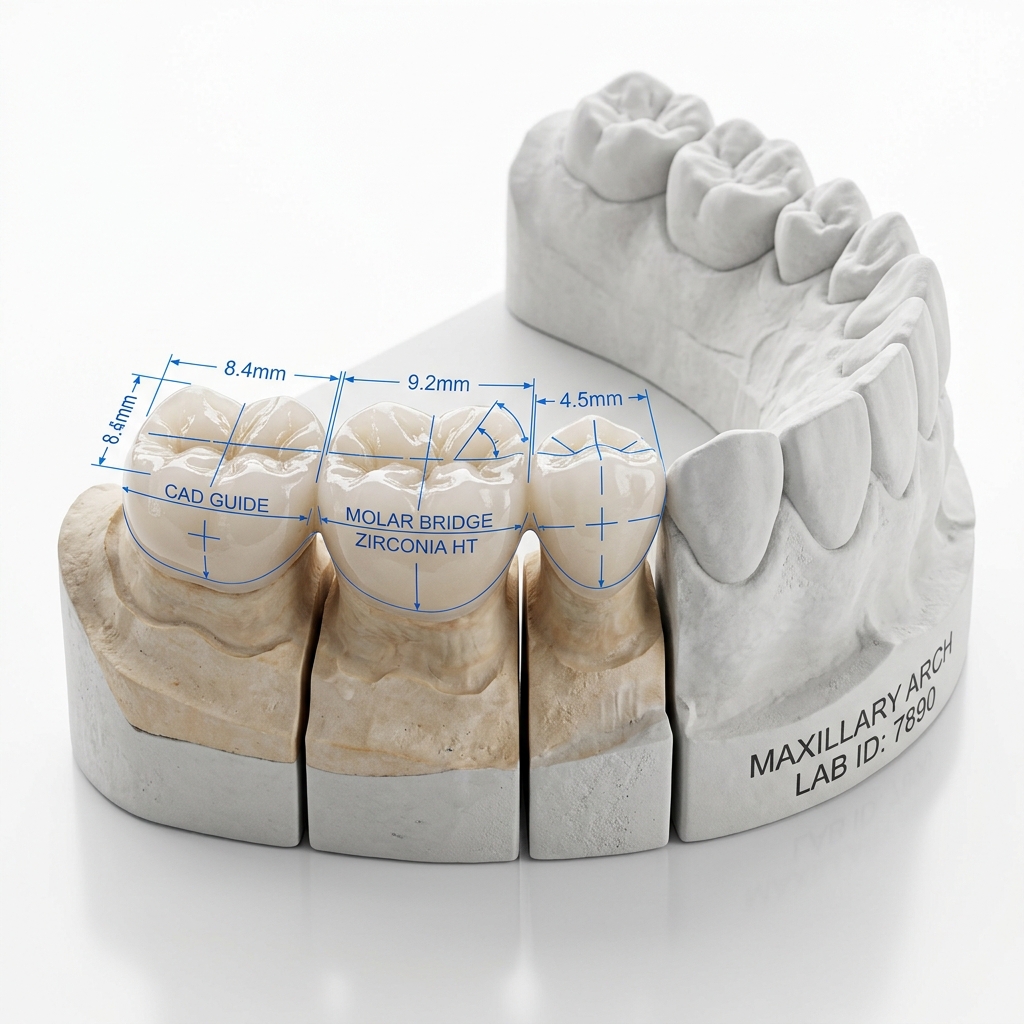
3-unit bridge design with Exocad connector size verification tool
Crown and bridge cases are our fastest designs — typically delivered within 8–16 hours. They require a prep scan, opposing arch, and bite registration. A clear case form stating the restoration material, contact preferences, and any patient-specific notes (bruxism, open bite, deep bite) helps us produce files that mill cleanly first time.
Full-Arch: What Changes and Why
Full-arch design — whether a screw-retained monolithic zirconia bar, a titanium-reinforced hybrid, or an individual crown-on-bar setup — requires planning that begins long before you take the impressions.
Key parameters we need for every full-arch case:
- Implant positions — scan bodies in situ + CBCT/DICOM if angulated implants are present
- VDO (vertical dimension of occlusion) — confirmed correct at the time of the record
- Lip line and smile line photos — essential for anterior tooth position and incisal edge placement
- Screw access locations — which positions are accessible for final torquing
- Bar material and bridge type — monolithic zirconia, PMMA temporary, titanium bar + crowns
Clinical tip: Try-in wax-ups or PMMA temporaries before the final design session dramatically improve first-fit rates. Send us photos of the temporary in function — we'll use them as the design template.
Planning a full-arch case?
Contact Daniel directly via WhatsApp for a pre-case consultation — we review scan quality and case specs before you submit.
Decision Framework: Which Path to Take
| Factor | Crown & Bridge | Full-Arch Implant |
|---|---|---|
| Number of implants | 0–2 | 4–8 |
| Span | 1–4 units | Full arch (12–14 units) |
| Materials considered | Zirconia, PMMA, E.max, wax | Zirconia, titanium bar, PMMA hybrid |
| Data required | Prep, opposing, bite | Scan bodies, CBCT, photos, VDO, lip line |
| Design time | 8–16 hours | 24–48 hours |
| Price per case | $5–$20/unit | $50–70 flat |
| Revision complexity | Low | High — consult before revising |
Hybrid Cases: When They Overlap
Some cases fall between these two categories:
- Implant single crowns (1–2 implants) — follow the crown/bridge workflow but require scan body data and abutment design as a separate step
- 3-4 implant bridges — designed as FPDs but with implant library referencing and connector planning that approaches partial-arch complexity
- Immediate loading temporaries — designed as full-arch PMMA with specific occlusal offloading protocols to protect osseointegration
For any case you're unsure how to classify, reach out before uploading. Five minutes of consultation upfront saves hours of revision later.
What to Include in Every Case Submission
- Case type clearly stated: Single crown / Bridge / Implant crown / Full arch
- Mill material specified: Zirconia grade, PMMA, wax, emax
- Prep scan OR scan body scans (implants)
- Full opposing arch — not cropped
- Buccal bite at MIP
- Contact preferences: light / medium / firm
- Special notes: bruxism, open bite, crossbite, patient esthetics requests
- For full-arch: lip line photo, VDO confirmation, screw access notes
The more context you provide, the faster and more accurate your design will be. Our designers read every case note — they're not optional extras. A thorough submission form is the single most reliable way to reduce revision frequency across any case type.