Veneer and smile design cases are the most visible work we do — literally. Unlike a crown on a second molar, a veneer on tooth #8 is the first thing a person sees when they smile. The stakes are high, revisions are costly, and approval by both clinician and patient must happen before you bond anything.
Over the years, we've refined a five-step digital workflow that consistently produces veneer designs that are approved on the first presentation — to both the dentist and the patient. Here's how it works.
What Is Digital Smile Design (DSD)?
Digital Smile Design is a planning protocol that combines facial photography, dental scanning, and CAD tools to design a smile that is proportional, esthetic, and predictable. It functions as a communication bridge between clinician, patient, and laboratory.
When implemented correctly, DSD eliminates the guesswork from veneer treatments and replaces subjective feedback ("make them brighter") with objective reference points ("tooth width-to-height ratio 0.75–0.80").
Key fact: In our studio, cases submitted with a full DSD package (facial photos + scan + reference photos) have a first-approval rate of 94% vs. 71% for scan-only submissions. The difference is facial reference.
Step 1: Facial Analysis — The Foundation of the Design
Every smile design must start with the face, not the mouth. We need to know:
- Facial midline — does the dental midline align with it? Should it?
- Lip line at full smile — how much tooth and gingiva is visible?
- Incisal edge position — where do the upper incisors sit relative to the upper lip at rest?
- Smile arc — does the incisal curvature follow the lower lip? (It should, in most esthetically driven cases)
For this step, we need at minimum: a full-face retracted smile photo, a relaxed smile photo, and a profile view. High-resolution JPEG files are fine — we work with these in our DSD planning software before touching the 3D model.
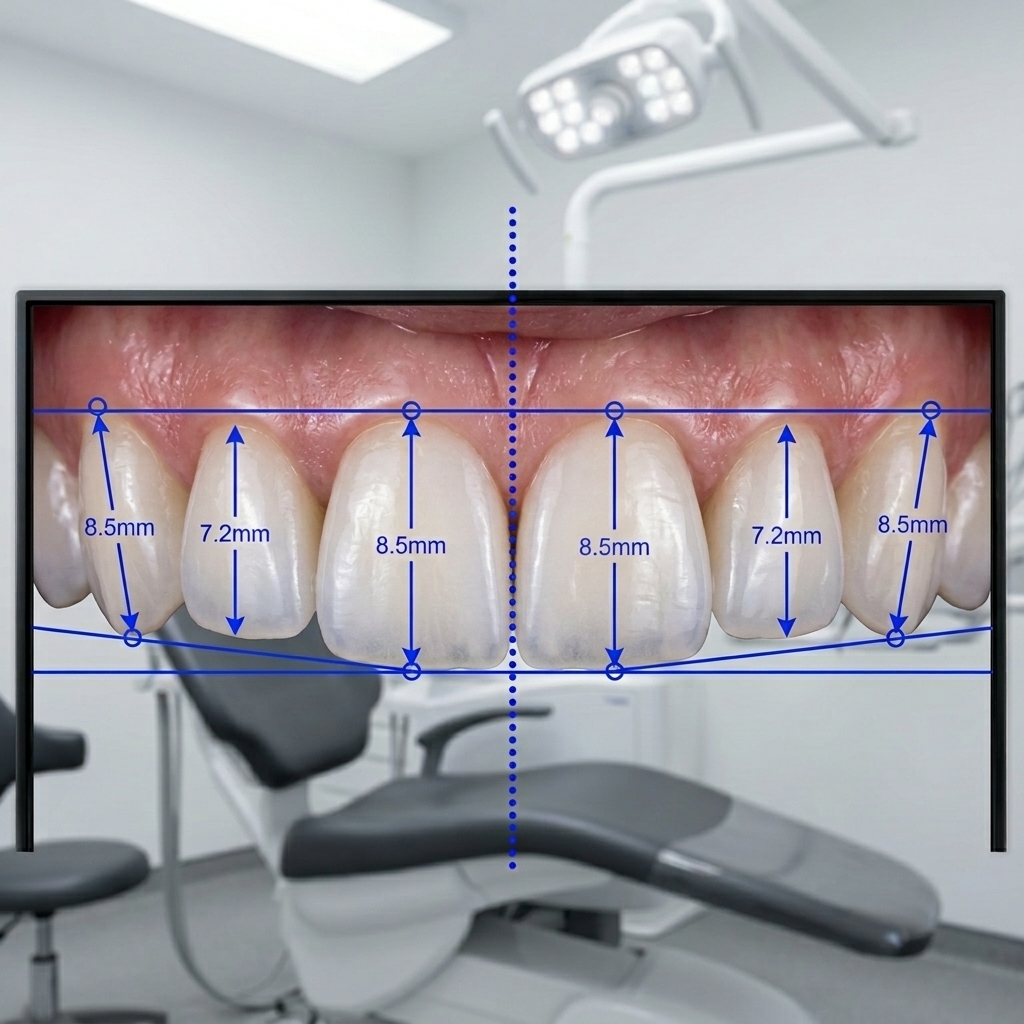
DSD analysis: midline, incisal edge, and tooth proportion guidelines overlaid on retracted smile photo
Step 2: 2D Design Mock-up — Patient Preview Before CAD
Before we open Exocad, we create a 2D wax-up overlay on your patient photographs. Using proportion guidelines and smile design software, we:
- Define tooth positions relative to facial landmarks
- Propose tooth proportions (width-to-height ratios for central, lateral, canine)
- Define the gingival symmetry line and whether gingival contouring is needed
- Generate a patient-preview image for initial approval
This step is where most patient expectation issues surface — and where they should be resolved, not at the try-in stage. The 2D preview gives patients a visual reference that's easy to understand and discuss.
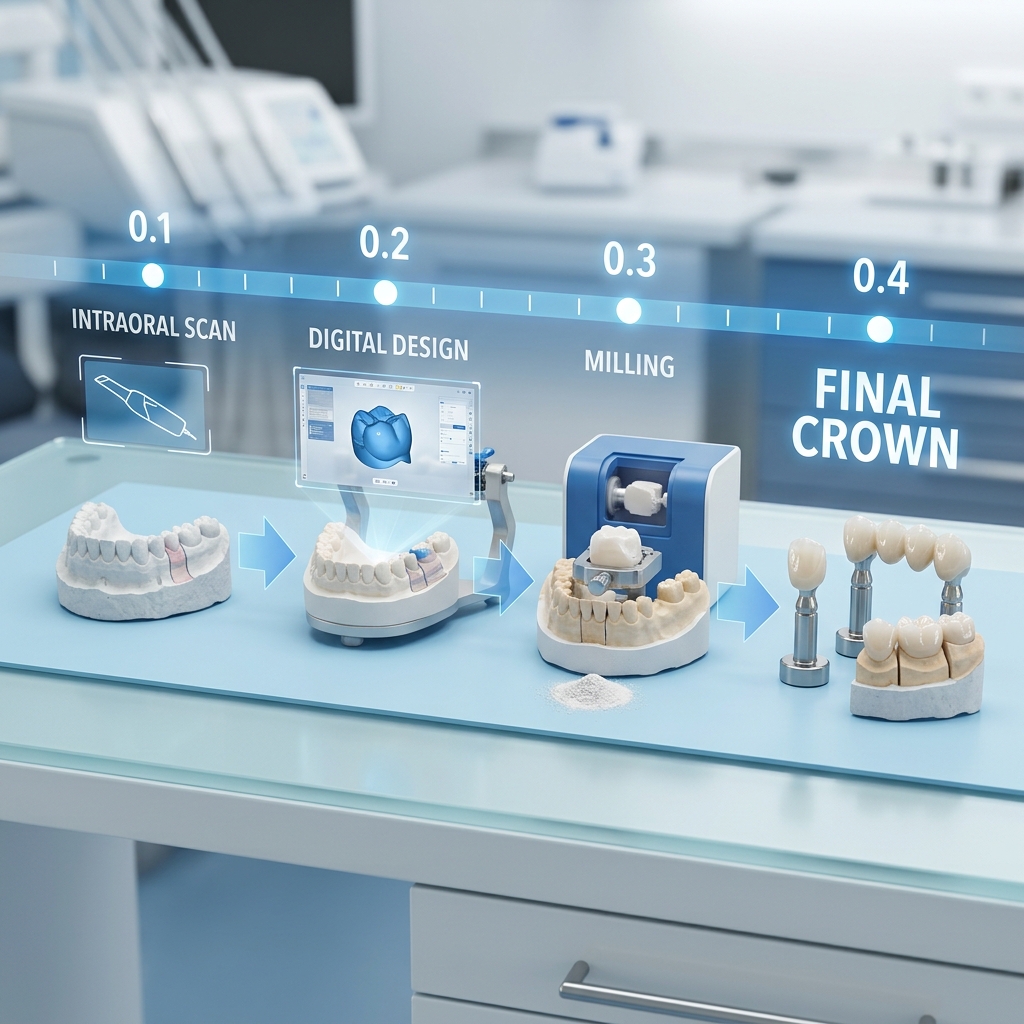
Step 3: 3D CAD Design — Translating the 2D Plan into STL
With the 2D design approved, we open the scan in Exocad and begin the 3D design. The 2D reference serves as our blueprint:
- Tooth positions locked to the midline and incisal edge height defined in Step 2
- Labial contours designed to match the approved tooth proportions
- Palatal surface designed to support the occlusal scheme (avoid heavy contacts on veneers — dentin-bonded veneers are not designed for occlusal load)
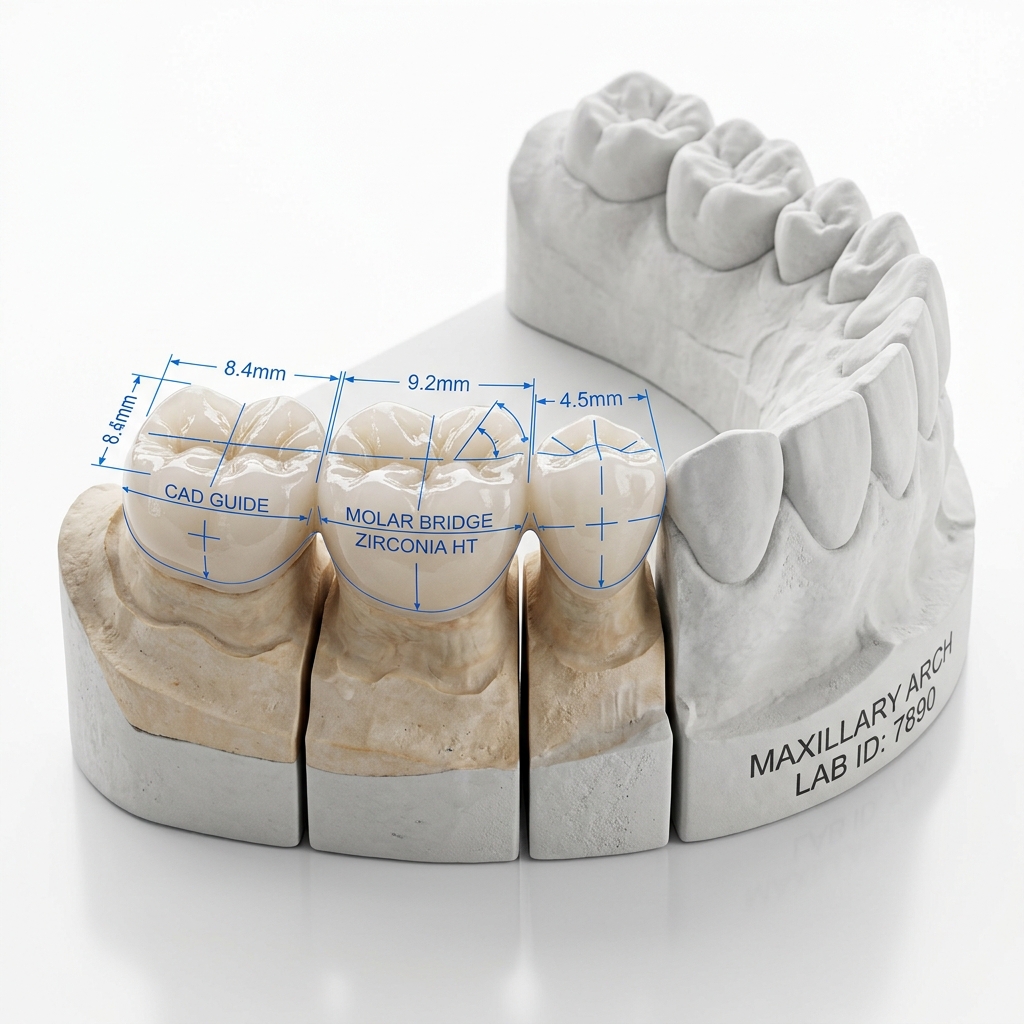
- Minimum thickness verified: 0.5mm at the incisal, 0.3mm minimum at cervical for feldspathic / pressable materials; 0.4mm minimum for zirconia
Have a veneer case ready to design?
Upload your scans and photos and we'll deliver a 3D design + patient preview within 24 hours.
Step 4: Clinical Validation with a PMMA Try-in
For complex multi-veneer cases (4 or more teeth), we strongly recommend a PMMA or wax try-in before the final design is approved and the restoration milled in ceramic. The try-in serves three validation functions:
- Esthetic validation — patient sees the result in their mouth, not on a screen
- Occlusal validation — confirm the design doesn't create premature contacts in function
- Phonetic validation — "S" and "F" sounds should not be affected by the new incisal edges
If modifications are needed after the PMMA try-in, we apply them to the digital model before the final design is signed off. This is far less costly than modifying a fired ceramic restoration.
Step 5: Final Delivery — What You Receive
After approval, we deliver:
- STL file for each veneer unit (or a grouped restoration file)
- Design notes covering minimum thickness measurements, contact specifications, and shade notes if applicable
- 3D screenshot from labial, palatal, and incisal views
- Patient preview image — the 2D composite — which you can share with the patient at bonding appointment
What to Send Us for Smile Design Cases
- Full-arch prep scan (STL)
- Opposing arch scan (STL)
- Buccal bite at MIP (STL)
- Full-face smile photo — natural smile, no retractor
- Retracted smile photo — lips retracted, frontal view
- Profile view photo
- Patient esthetic preferences — shape references, shade target
- Gingival contouring planned? (Yes/No)
- Material: feldspathic, E.max press, zirconia veneer
- Lab name / clinician preferences for contact design
The most successful smile cases we've designed have one thing in common: a clinician who invested time in the reference photography and communicated the patient's expectations clearly. Give us that foundation, and we'll deliver a digital smile your patient will want to show everyone they know.