Margin design is one of the most critical — and most underestimated — steps in dental CAD. A crown can look anatomically perfect, contacts can be ideal, occlusion can be balanced… but if the margin is wrong, the case fails.
In this guide, we break down how professional CAD designers approach margin design step by step — focusing on real clinical outcomes, not just software tools.
Why Margin Design Matters More Than You Think

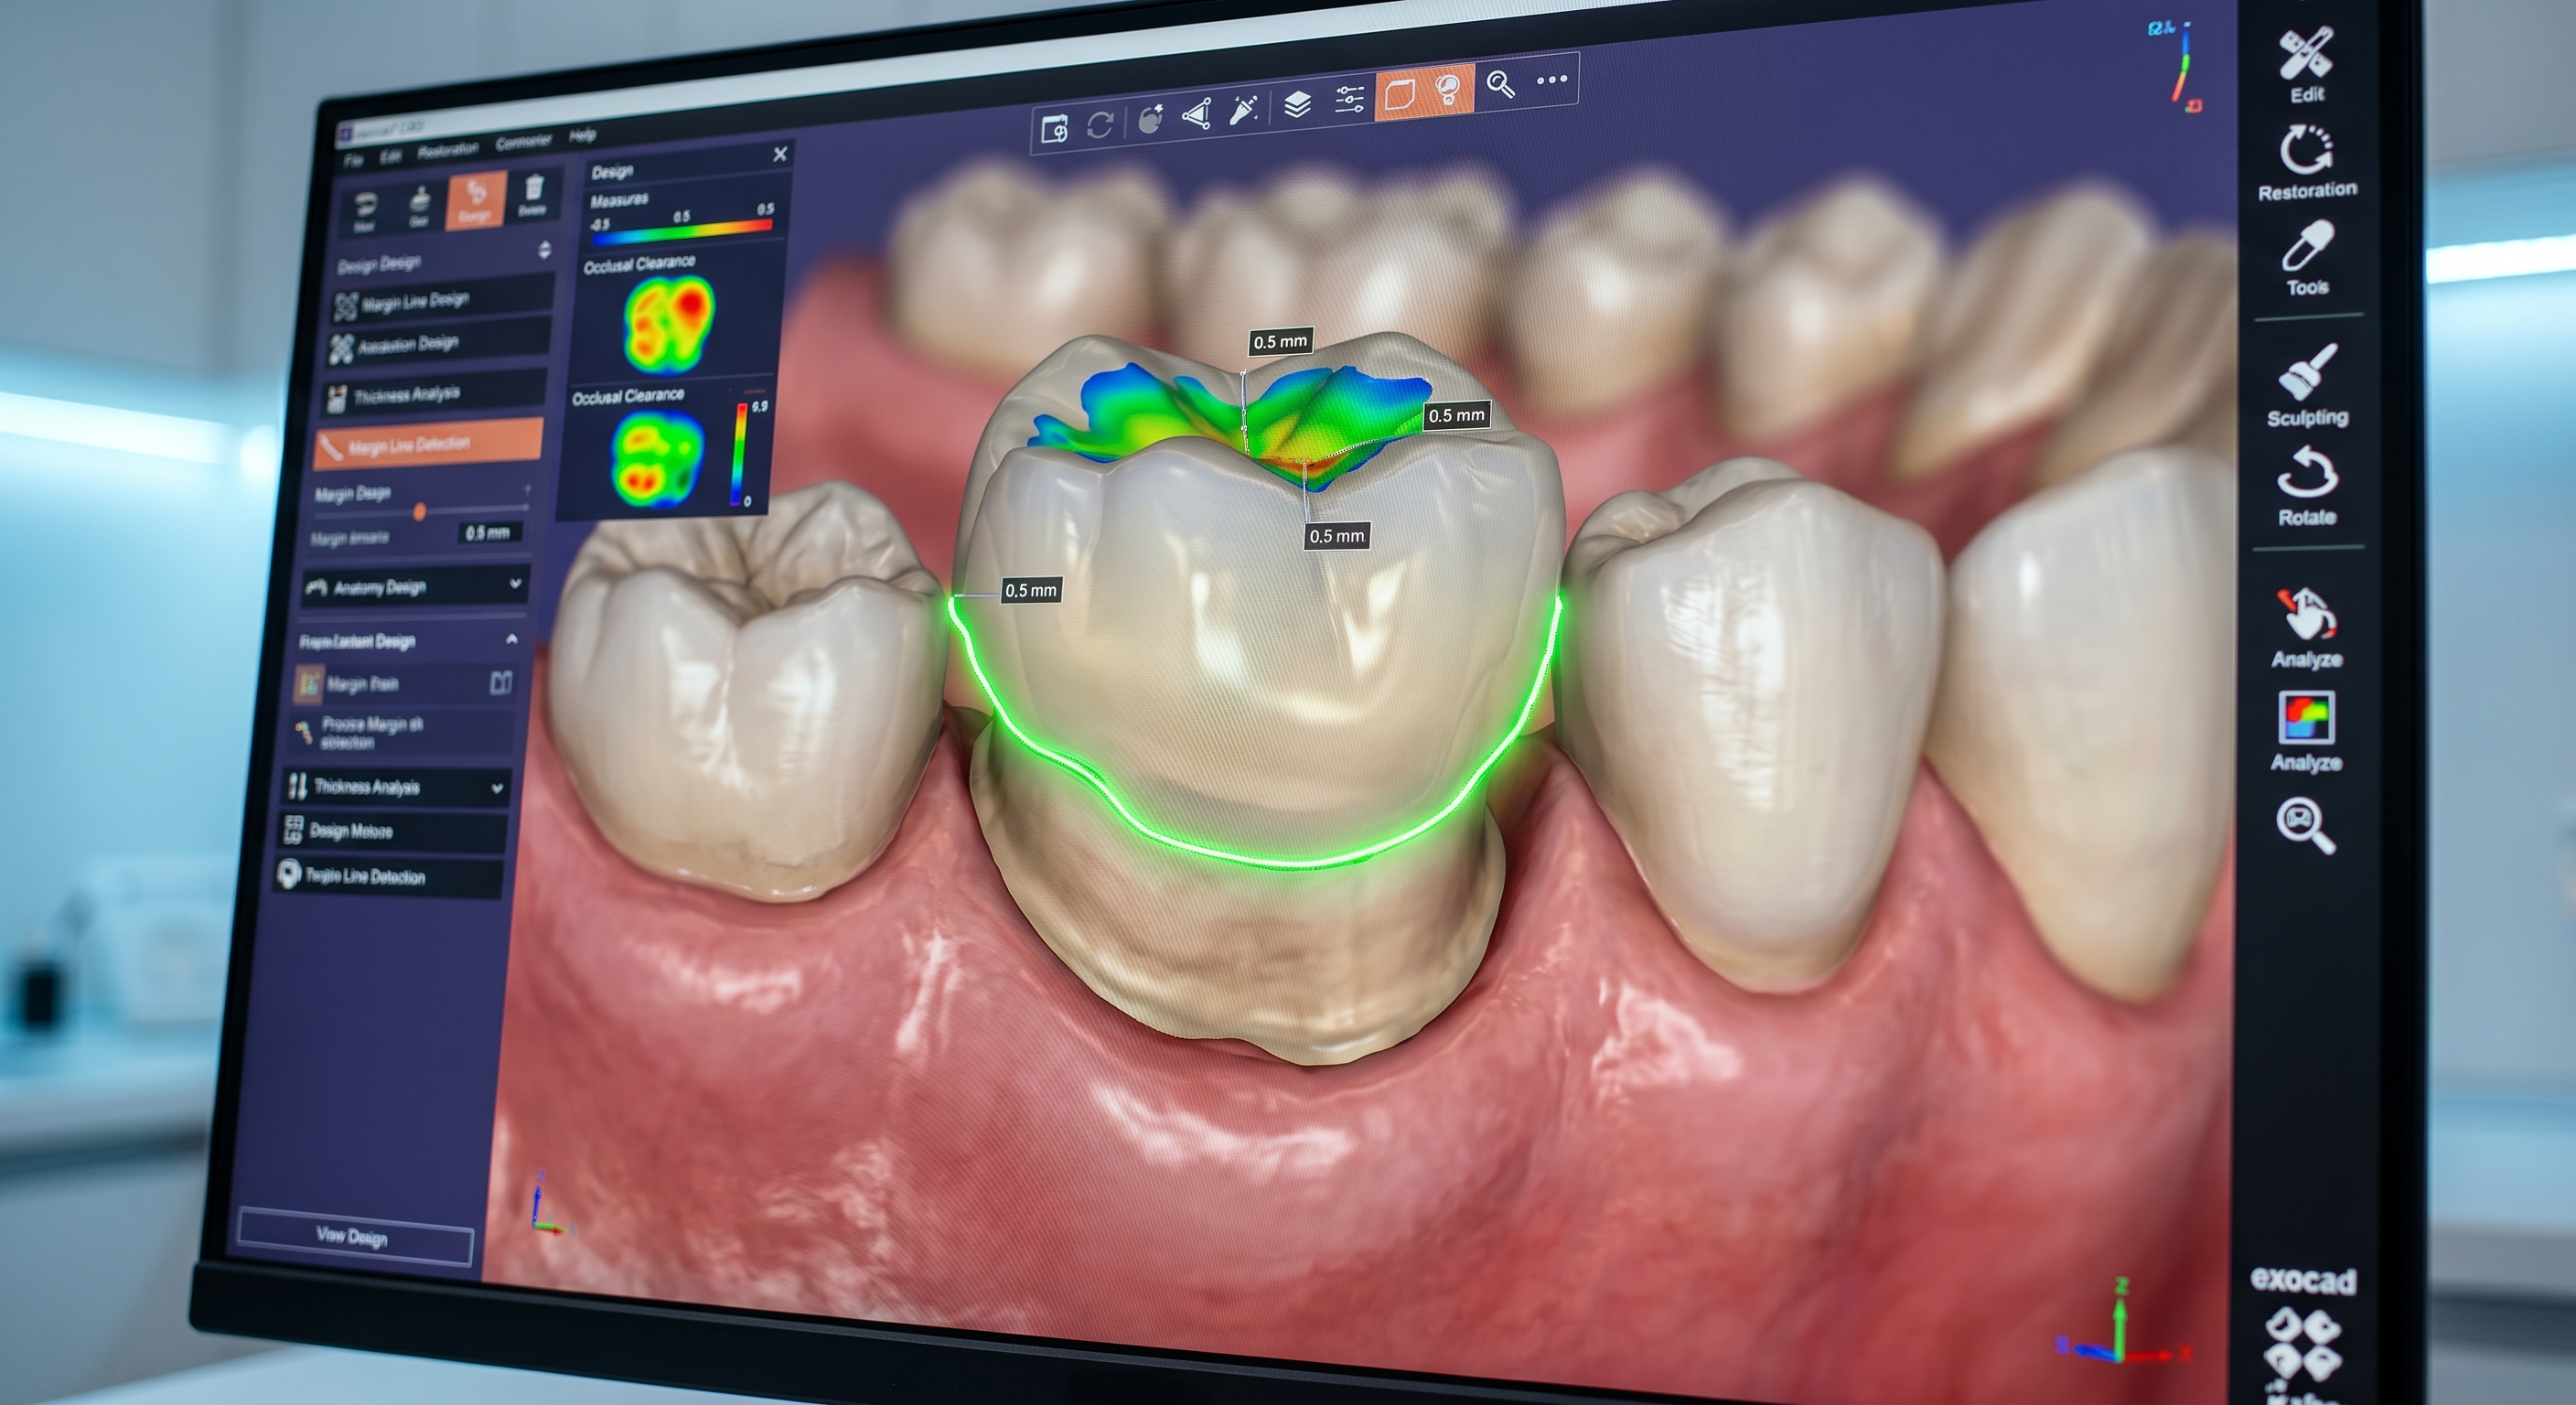
AI-assisted margin detection in CAD software — always verify manually
The margin defines the exact boundary between the restoration and the tooth. Even microscopic errors at this level can lead to:
- Open margins and bacterial leakage
- Poor crown seating
- Cement failure over time
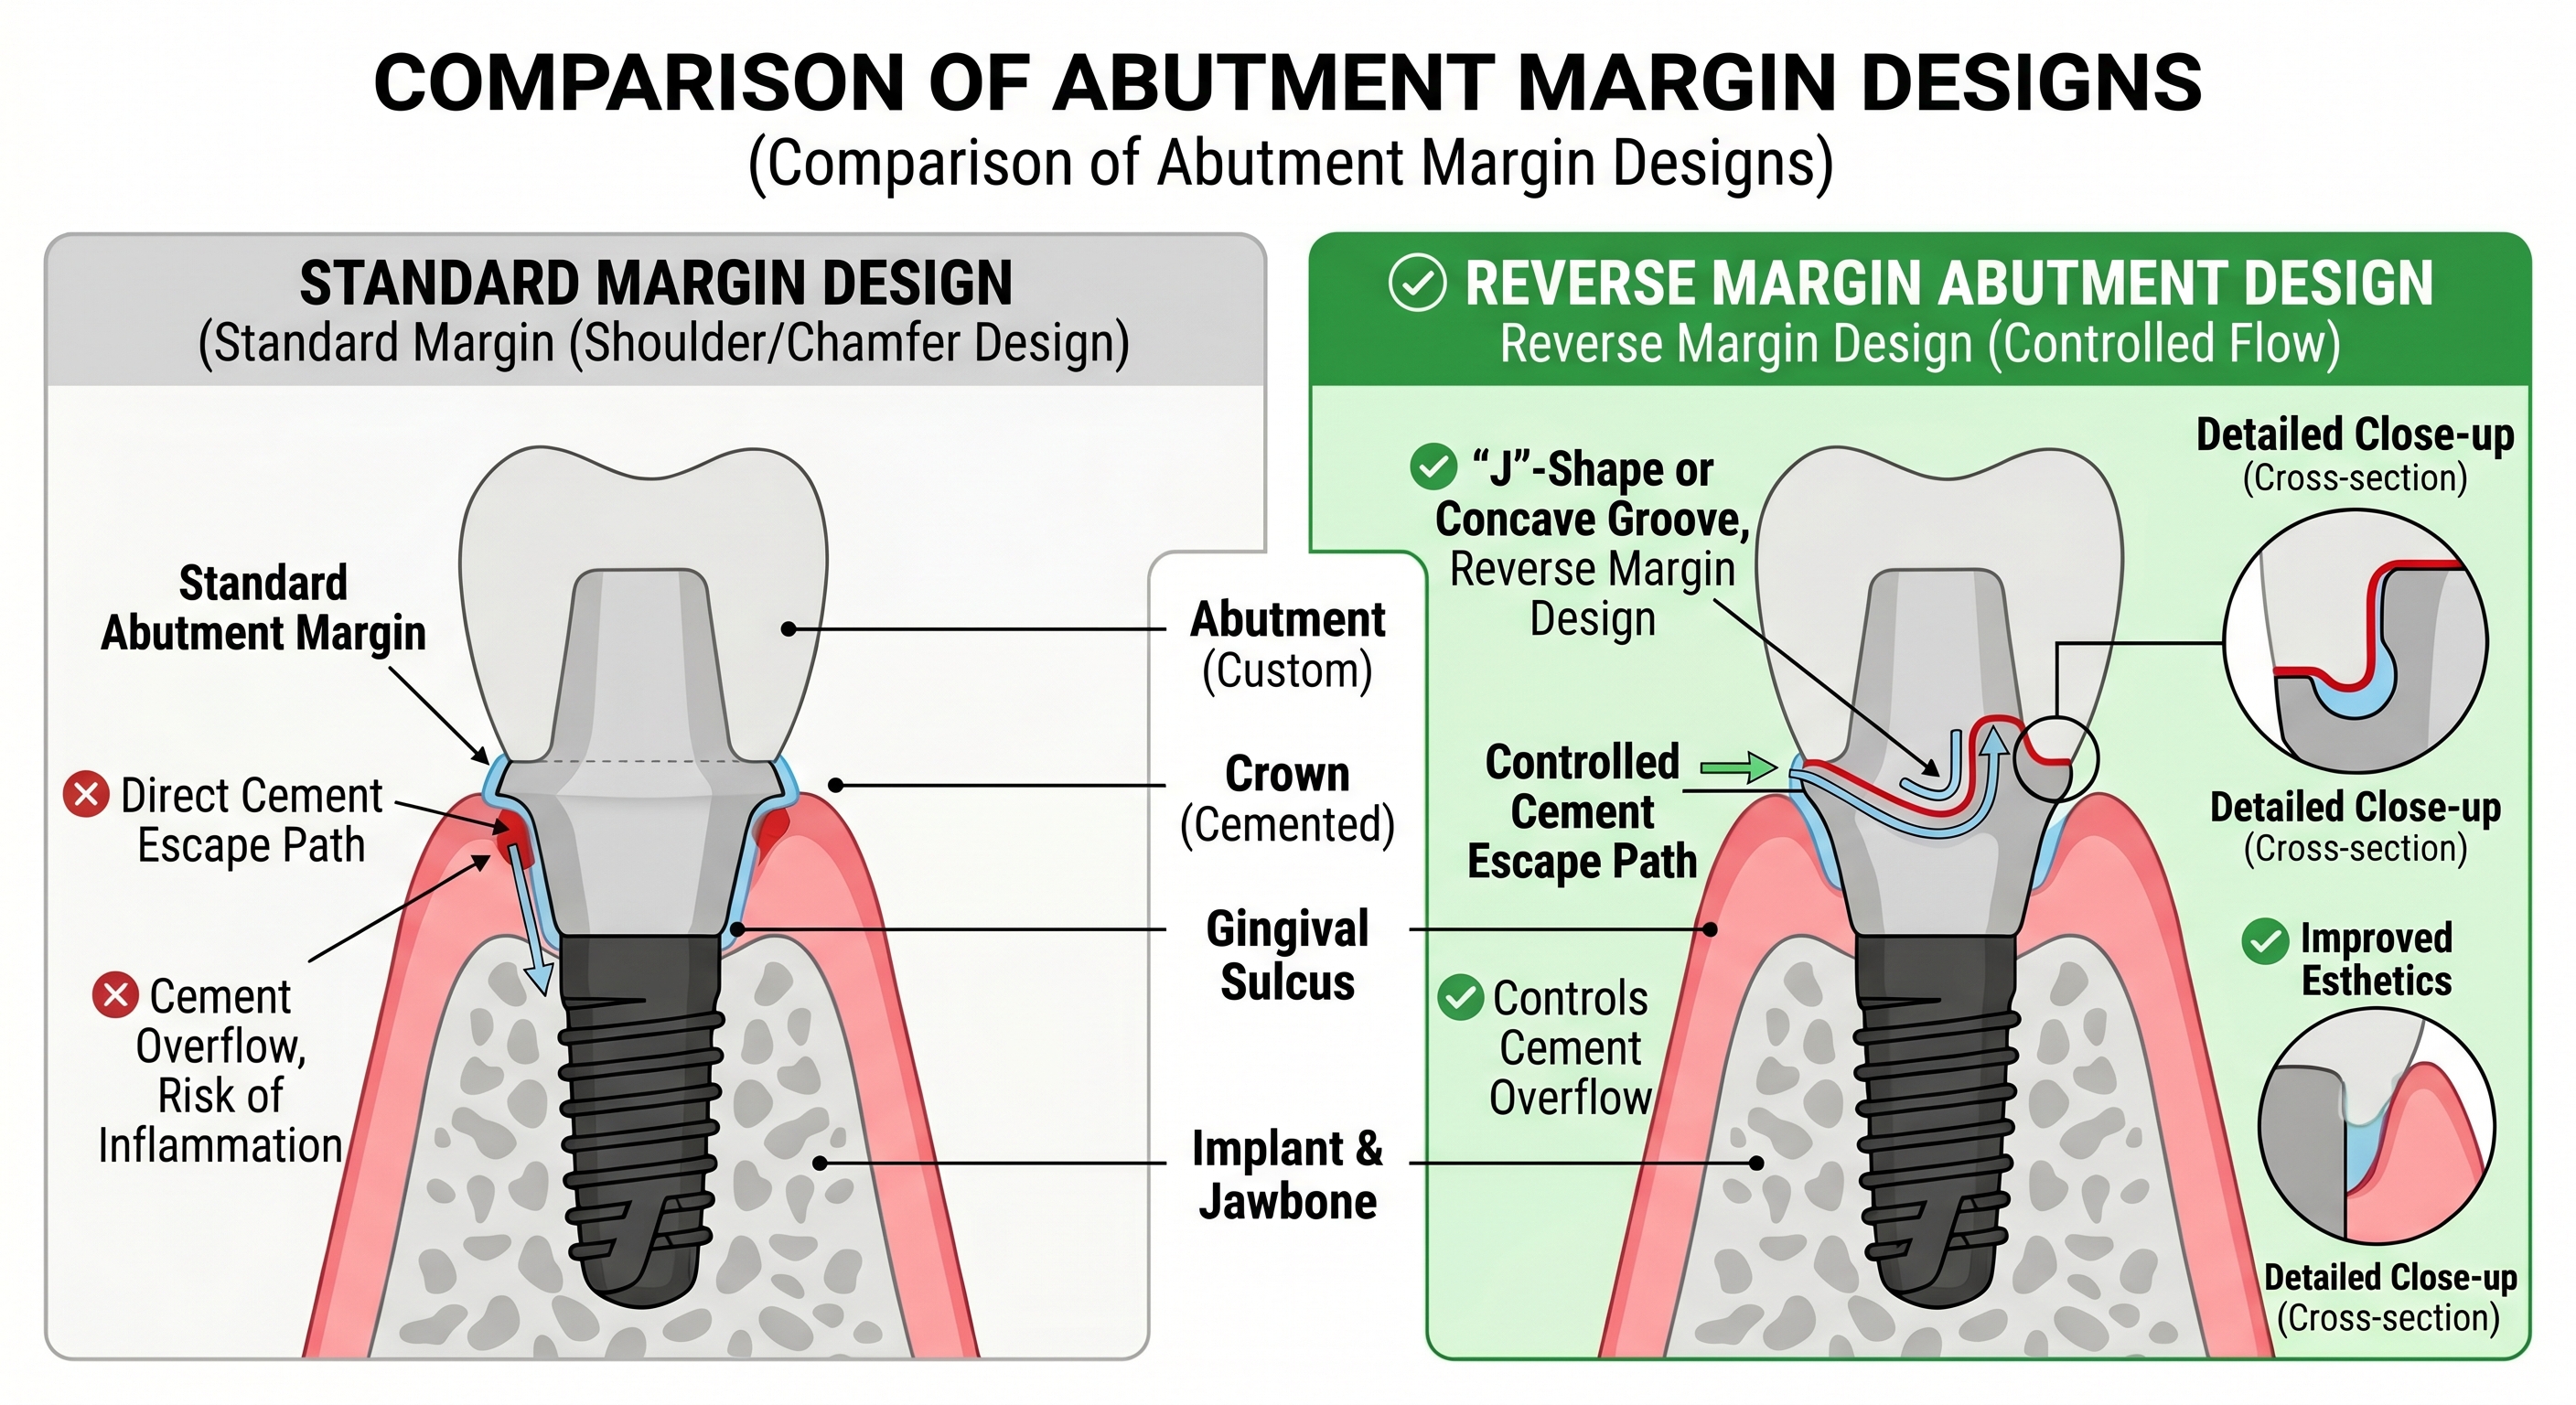
- Gingival irritation in subgingival cases
In short: margin accuracy directly impacts long-term clinical success.
Step 1: Start With Scan Evaluation — Not the Margin Tool
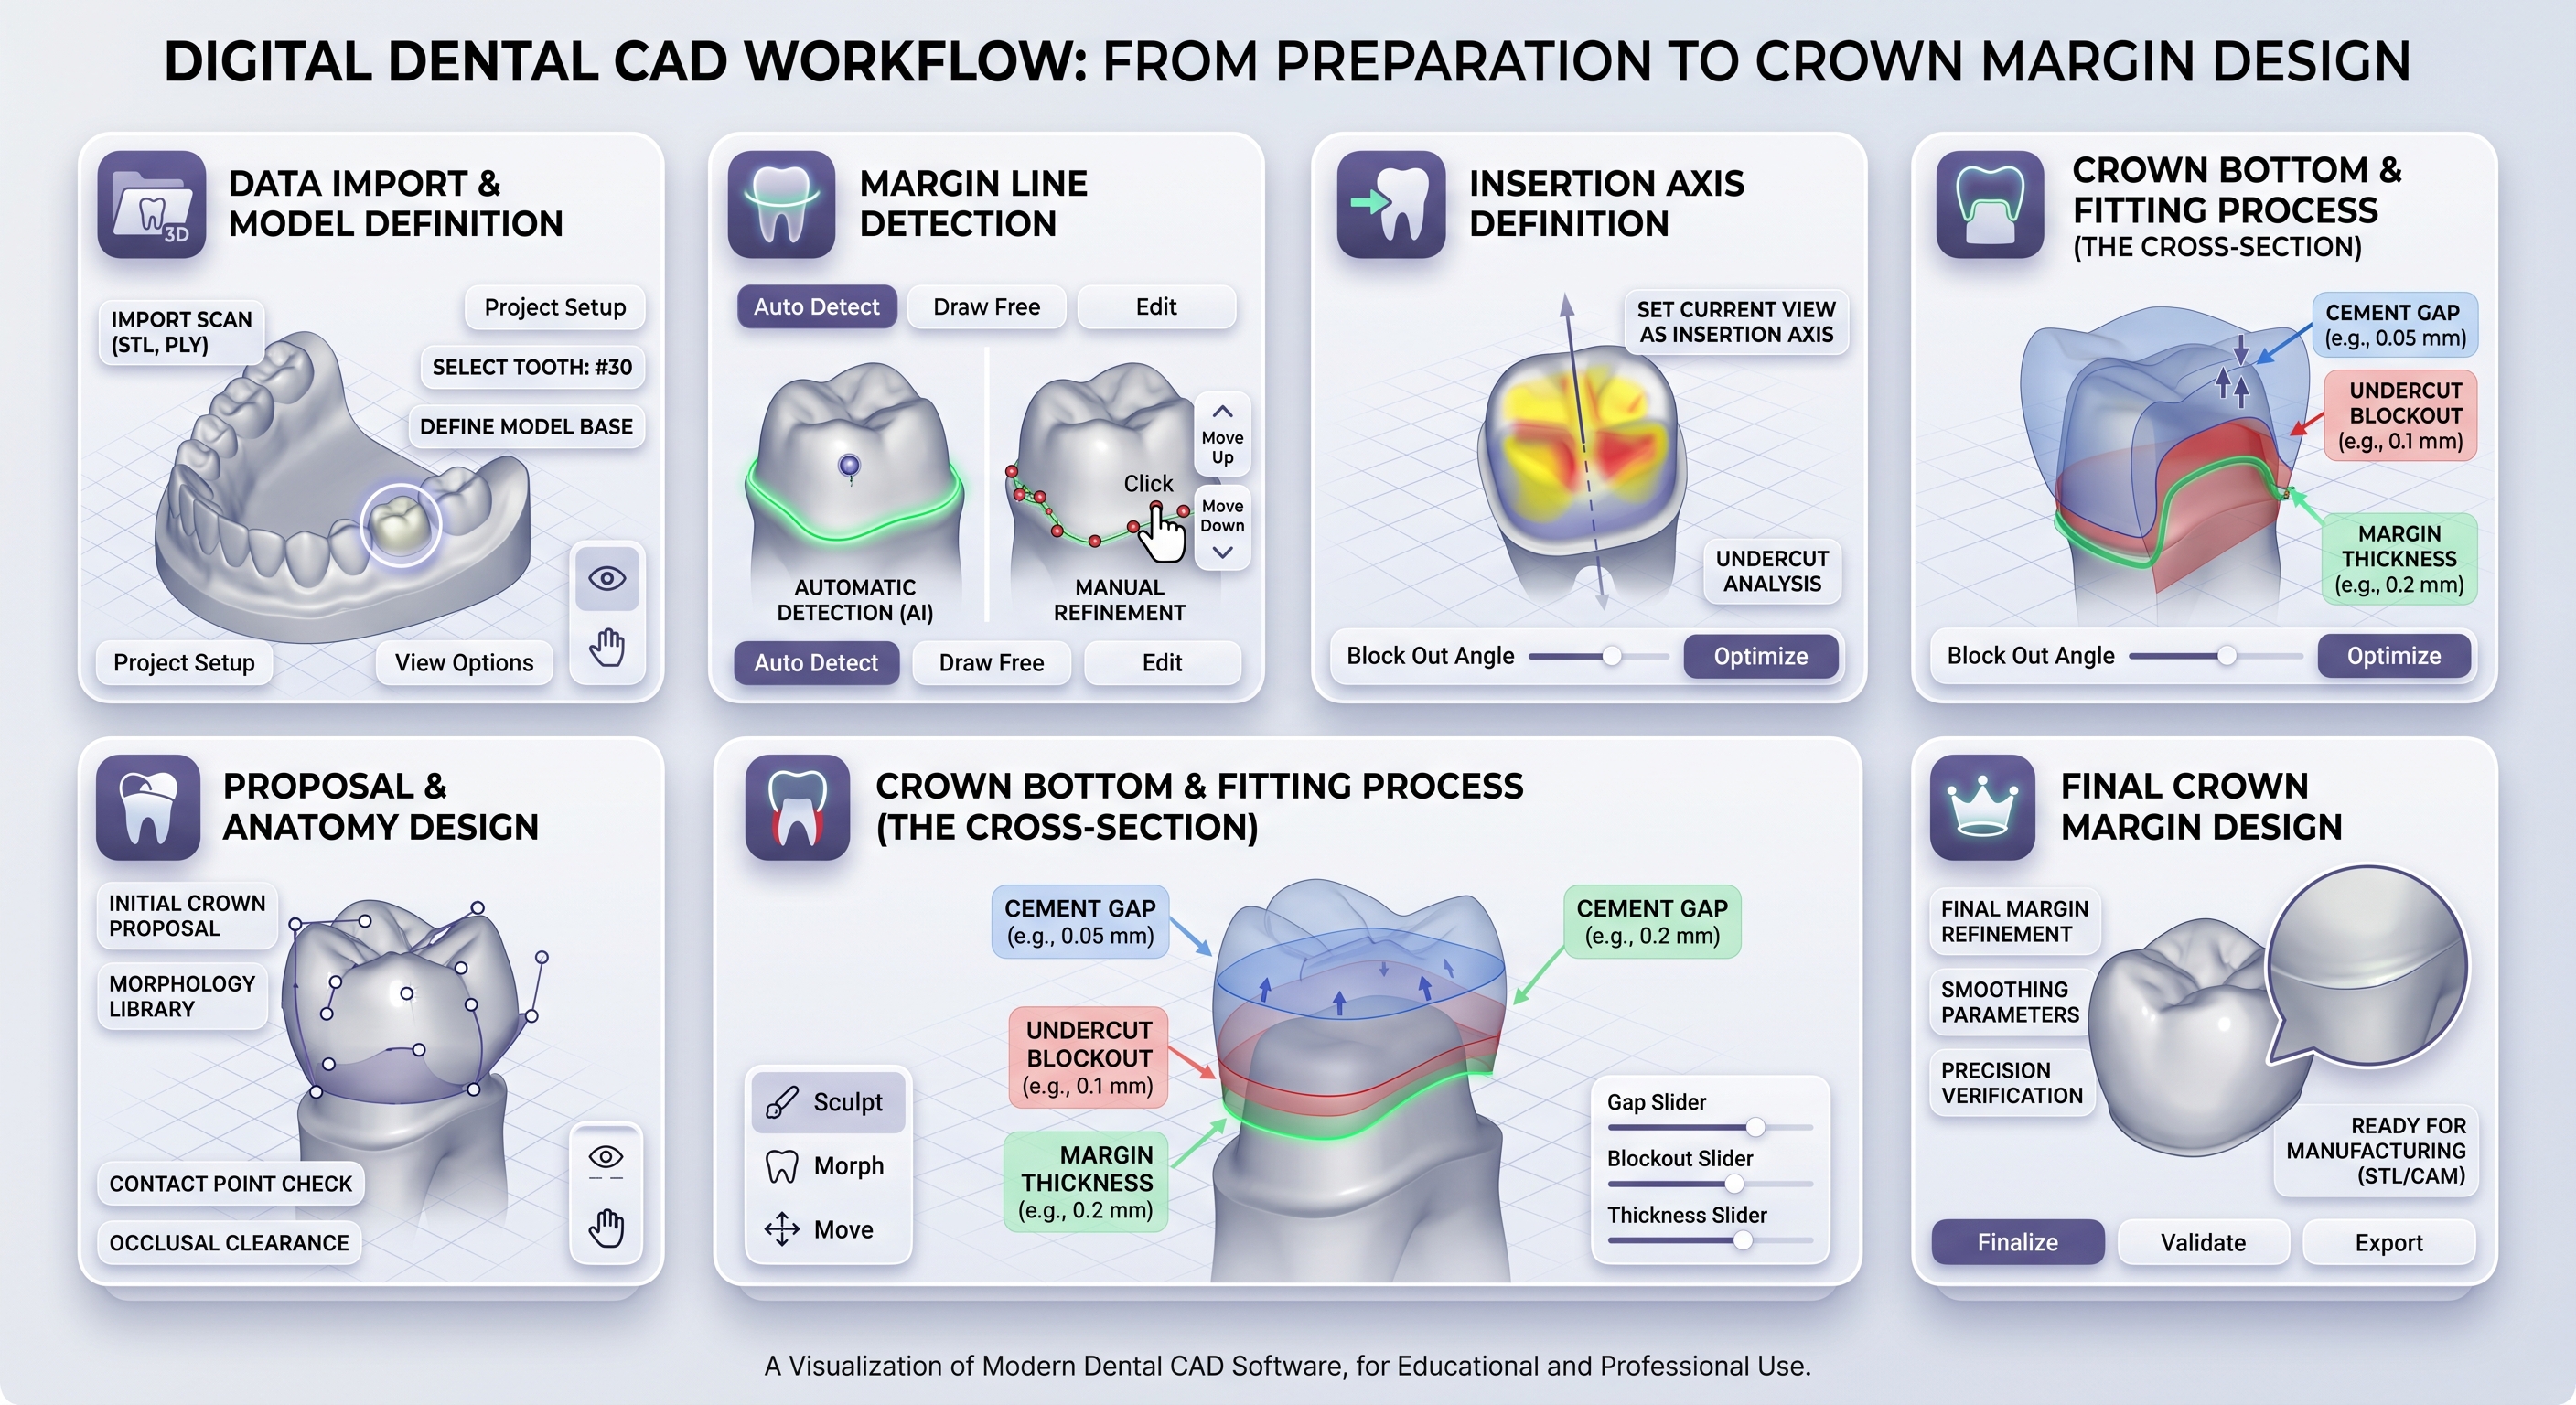
A structured workflow ensures consistent and accurate margin design
Before drawing anything, evaluate the scan quality carefully.
A good margin design is impossible without a readable finish line. Check for:
- Clear and continuous preparation boundary
- No soft tissue overlap or saliva distortion
- Consistent scan resolution around the entire tooth
If the margin is unclear, do not guess. The correct decision is to request a new scan.
Step 2: Identify the True Finish Line
This is where experience matters most.
The margin is not where the scan fades — it is where the preparation ends.
Rotate the model, inspect from multiple angles, and use cross-section tools if needed. A correct margin should be:
- Continuous (no breaks or jumps)
- Smooth (no sharp spikes or noise)
- Biologically logical
Step 3: Draw and Refine the Margin Line
Whether you use manual drawing or AI-assisted detection, refinement is always required.
Best practices used by experienced designers:
- Use fewer control points for smoother curves
- Avoid overfitting to scan noise
- Continuously zoom in and validate micro details
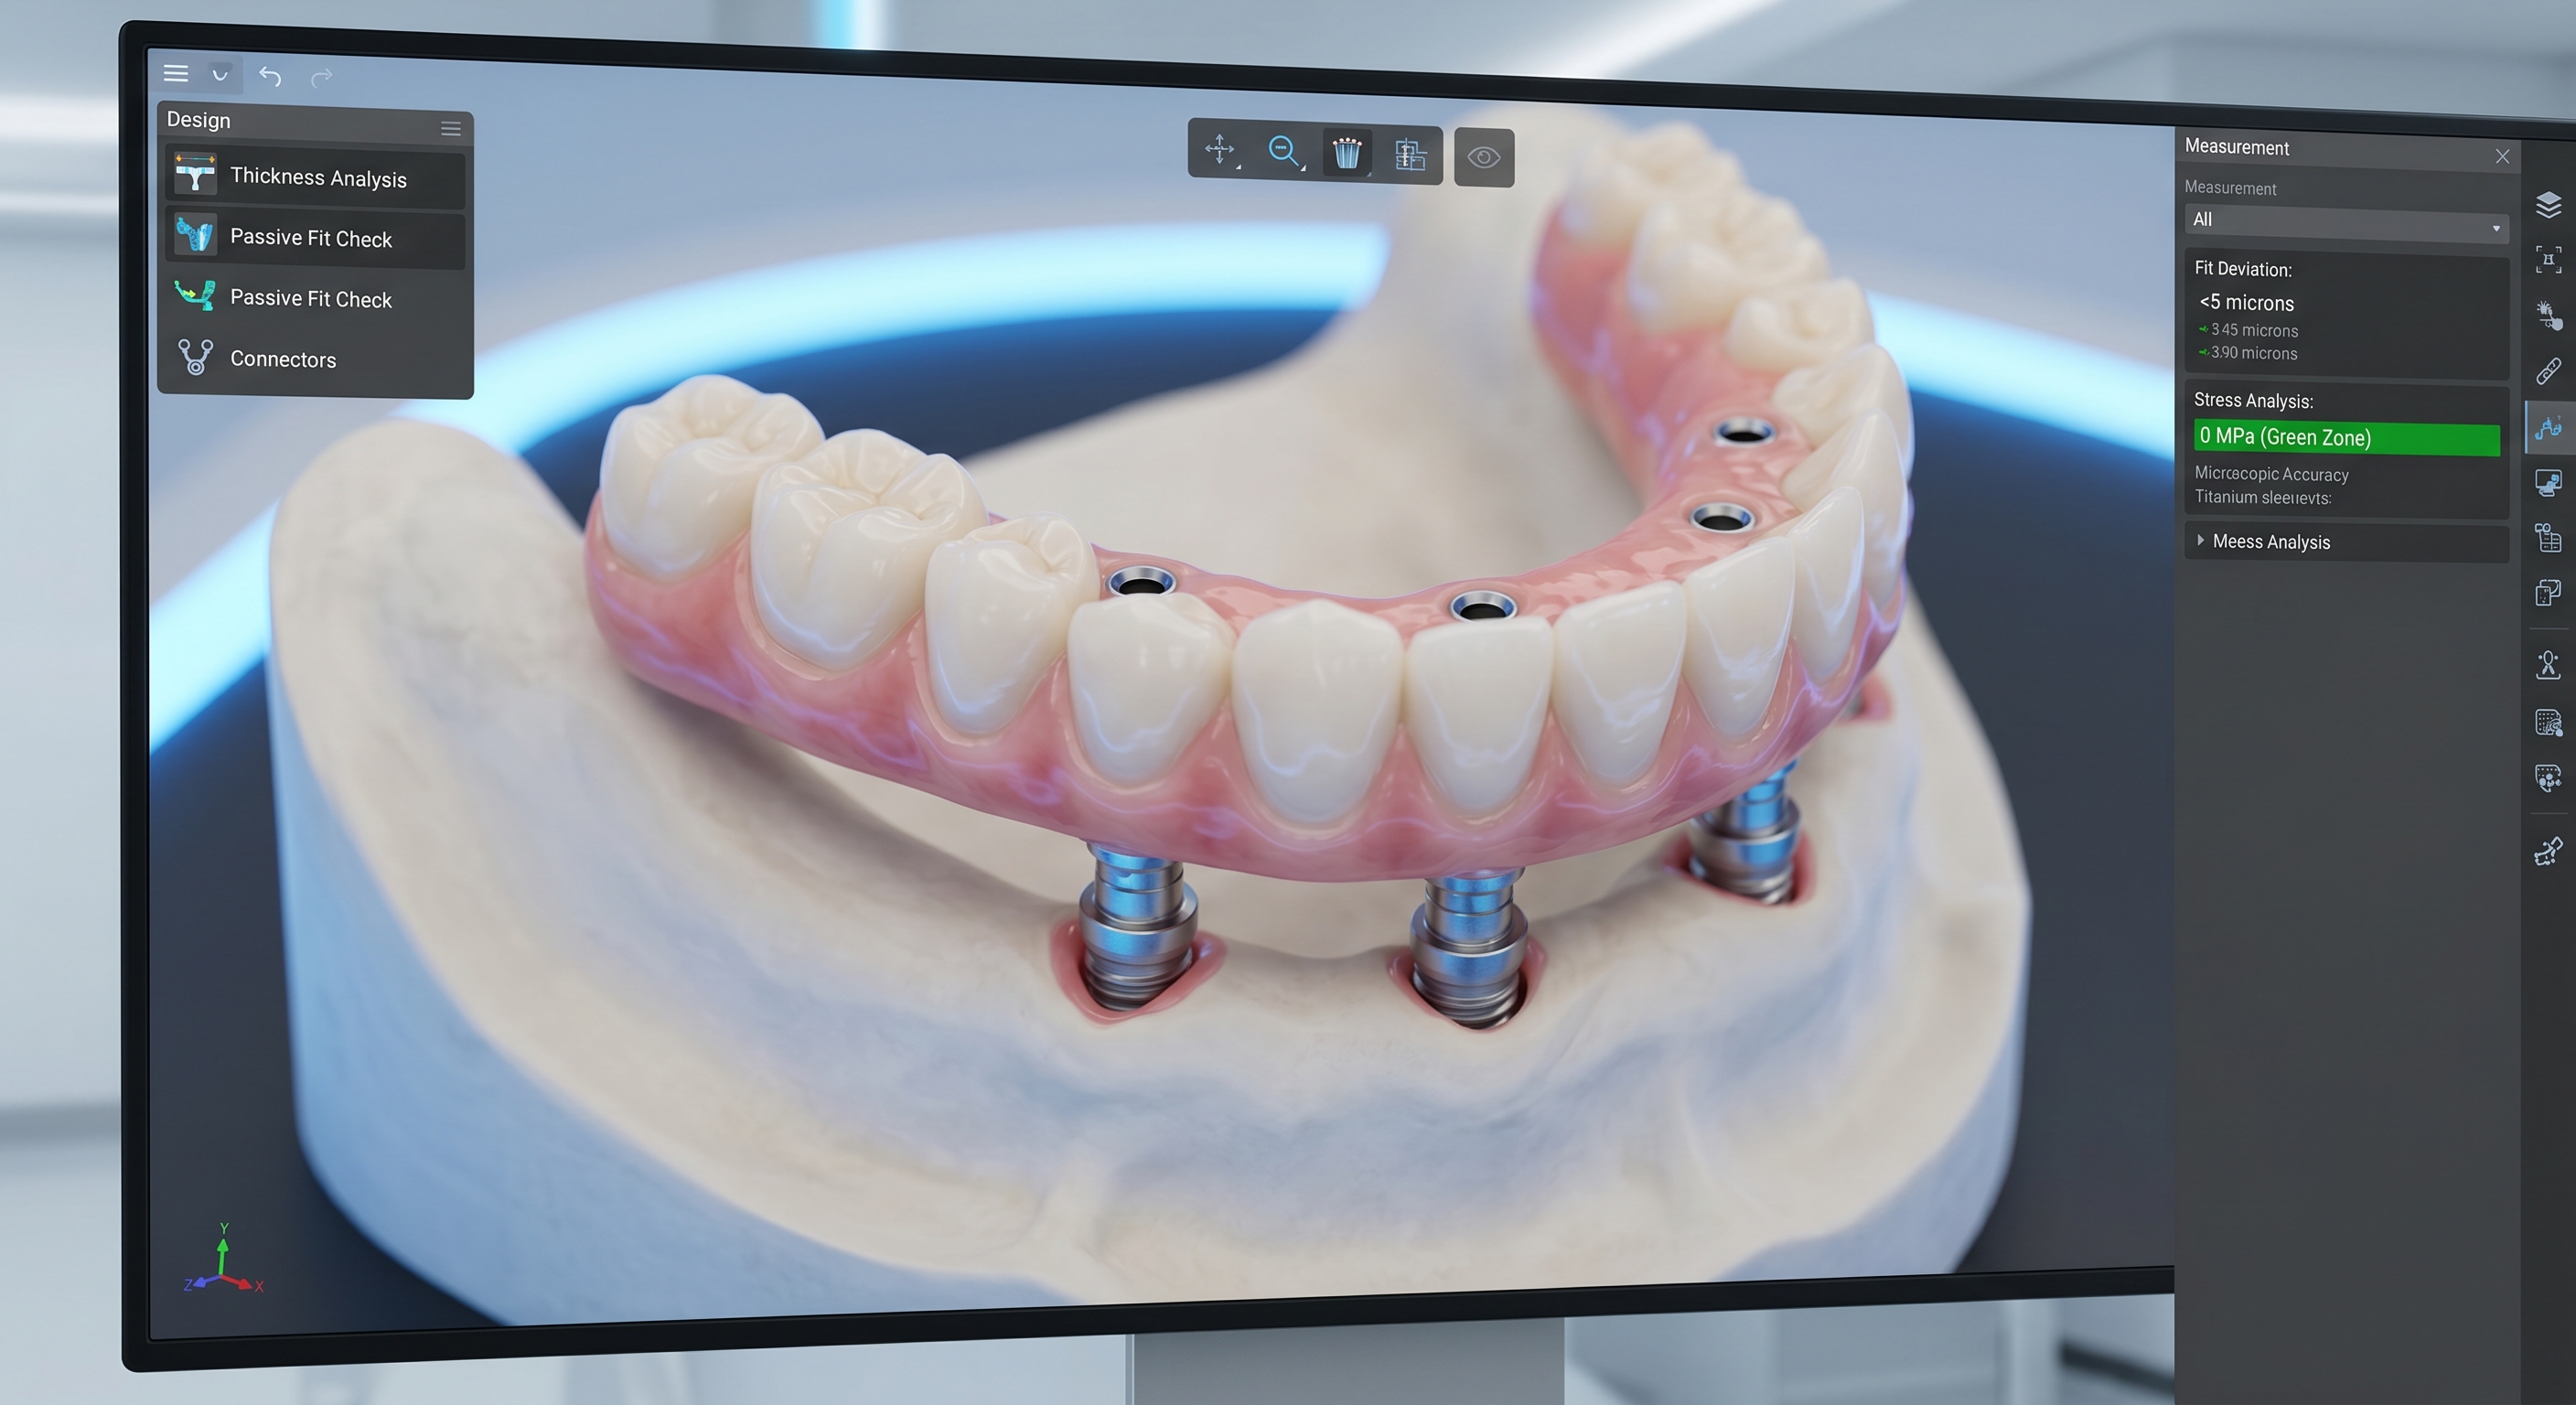
Step 4: Validate Crown Adaptation
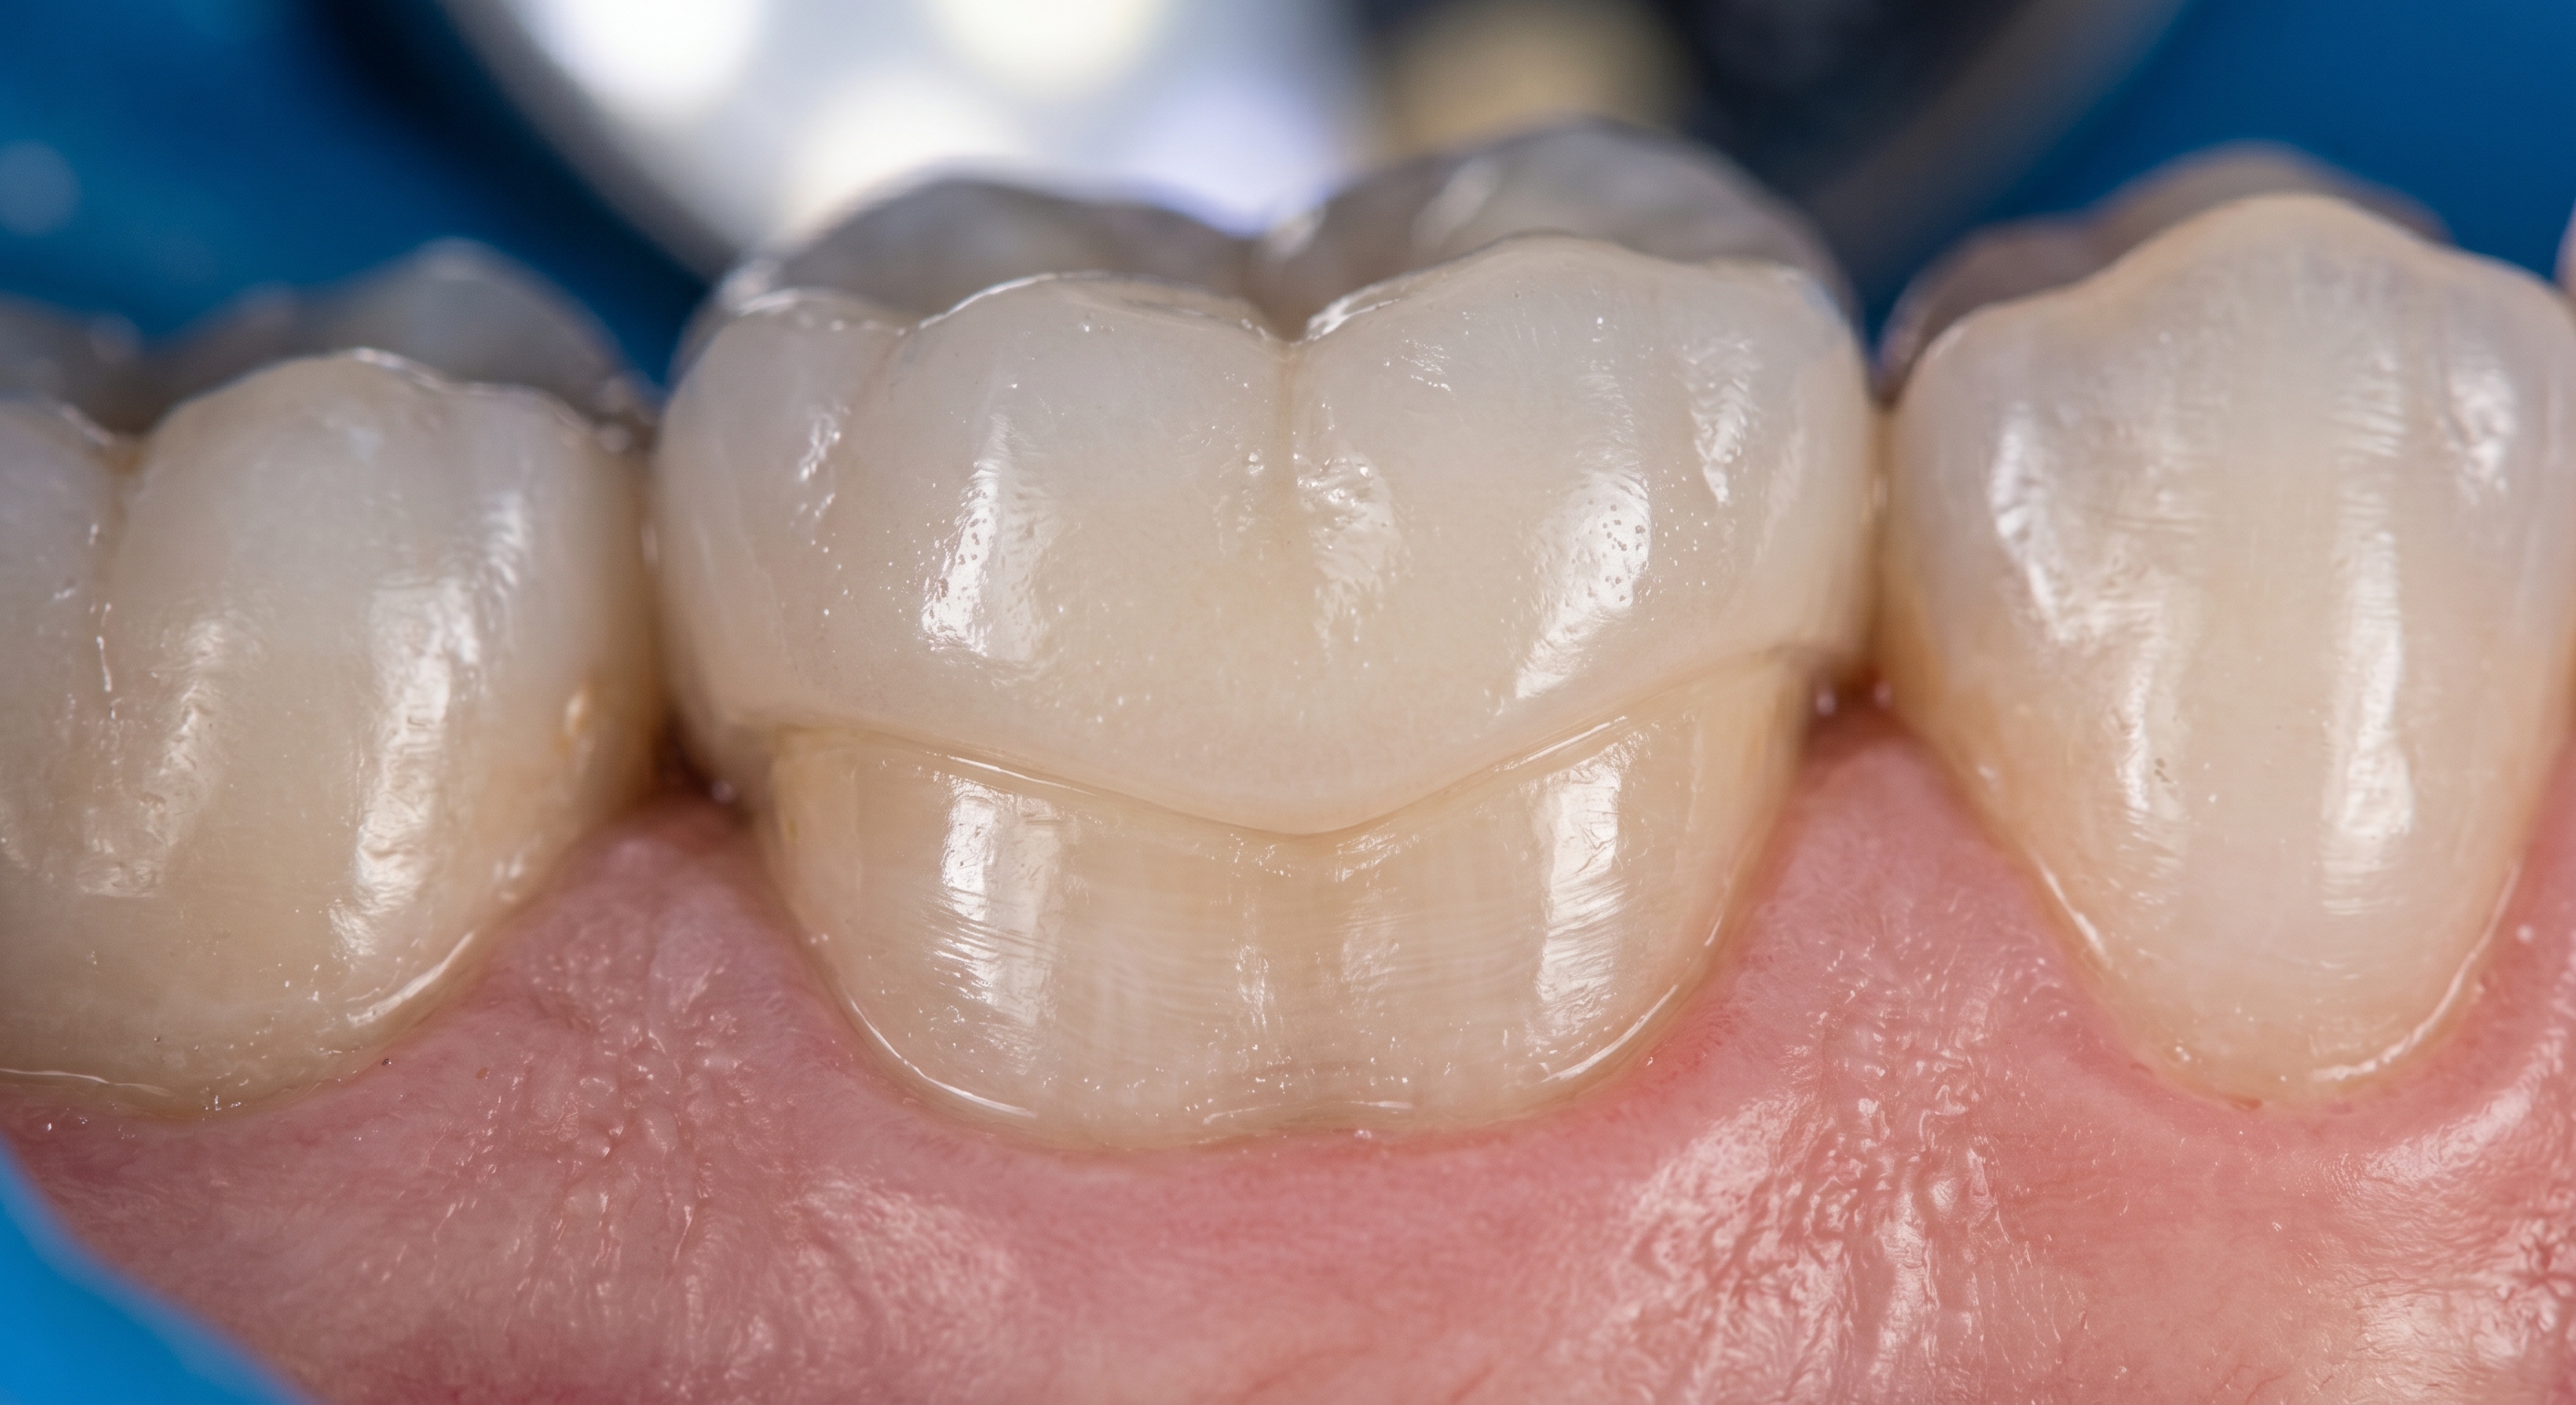
A clinically successful margin results in seamless crown adaptation
Once the crown is generated, margin validation begins.
This is where many designers stop too early — but this step is critical.
Check for:
- No visible gap between crown and tooth
- No overextension beyond the margin
- Uniform adaptation around the entire circumference
Step 5: Adjust for Material and Manufacturing
Margins must work not only clinically — but mechanically.
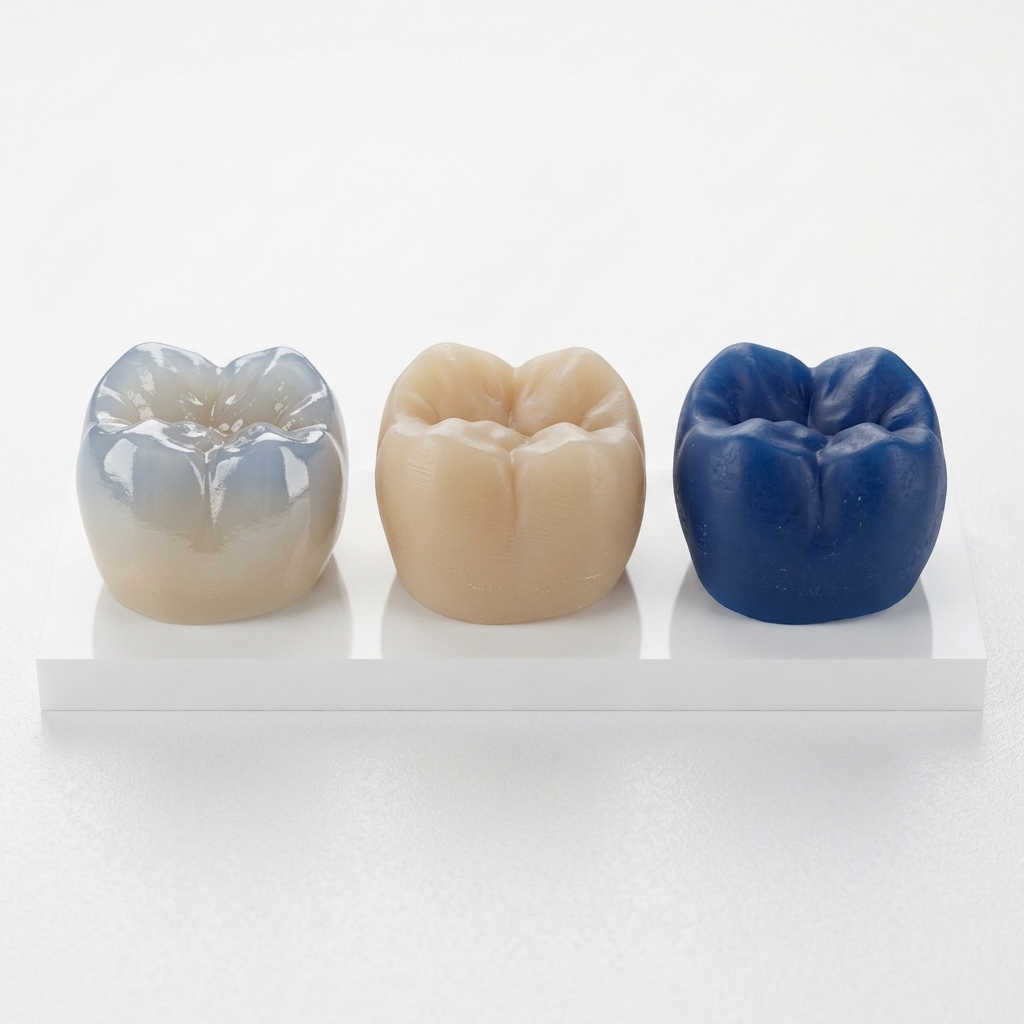
Different materials behave differently:
- Zirconia: requires smooth, slightly thicker margins
- Glass ceramics (e.max): sensitive to sharp edges
- Milling tools: cannot reproduce extremely sharp internal corners
Ignoring these factors leads to chipping, poor fit, or milling errors.
Common Margin Design Mistakes
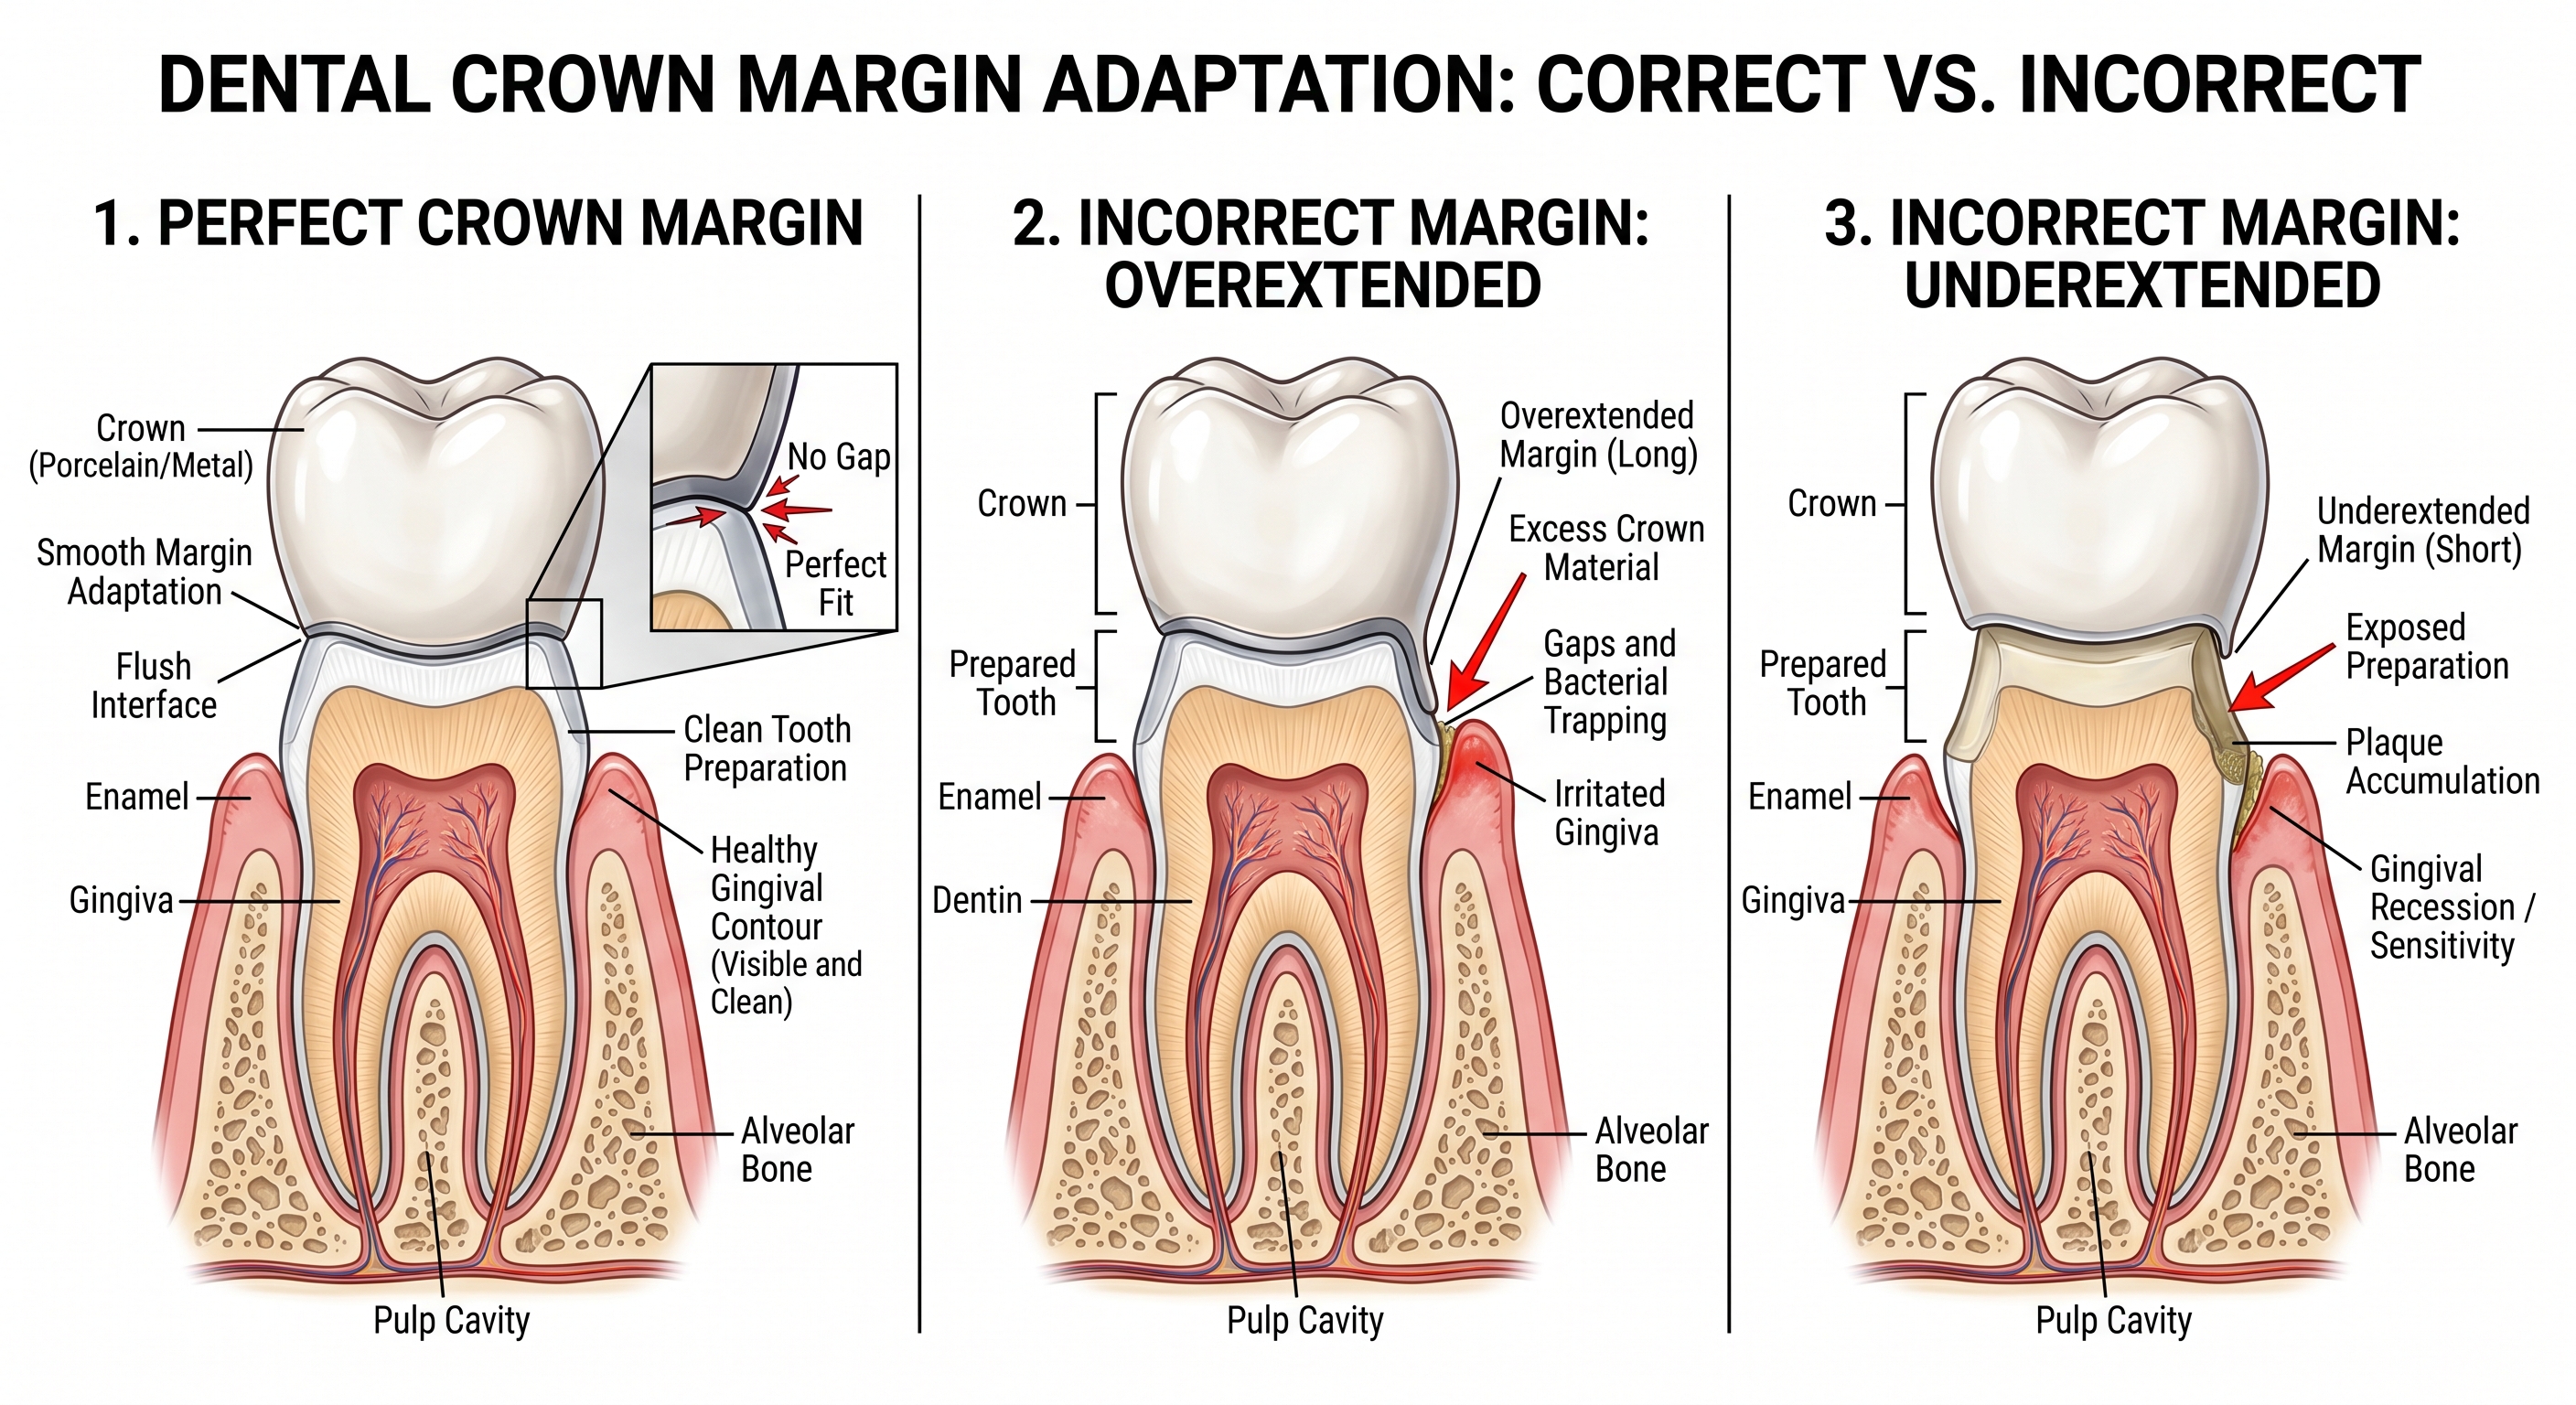
Incorrect margins lead to clinical failure — precision is everything
- Blindly trusting AI margin detection
- Following scan artifacts instead of preparation geometry
- Over-smoothing and losing critical margin detail
- Ignoring subgingival complexity
Final Thought
Perfect margins are not created by software — they are created by judgment.
The best dental CAD designers combine technical precision with clinical understanding. Tools can assist. AI can accelerate. But accuracy always depends on the person behind the screen.
At identcad, every margin is manually verified and refined. Because in real clinical dentistry, that final level of precision is what defines success.